Client Information Portal (CIP)
1. Rollover the cursor on Accessories tab at left menu bar and click.
2. Click on Client Info Portal (CIP) tab.
3. Click New tab at the top right of the screen.
5. Fill the form for Primary Information.
7. Fill the form for Social Media information.
8. Click Create button at the bottom of the page.
9. New Client information will be created, and displayed in CIP table.
1. Rollover the cursor on Accessories tab at left menu bar and click.
2. Click on Client Info Portal (CIP) tab.
3. Click New tab at the top right of the screen.
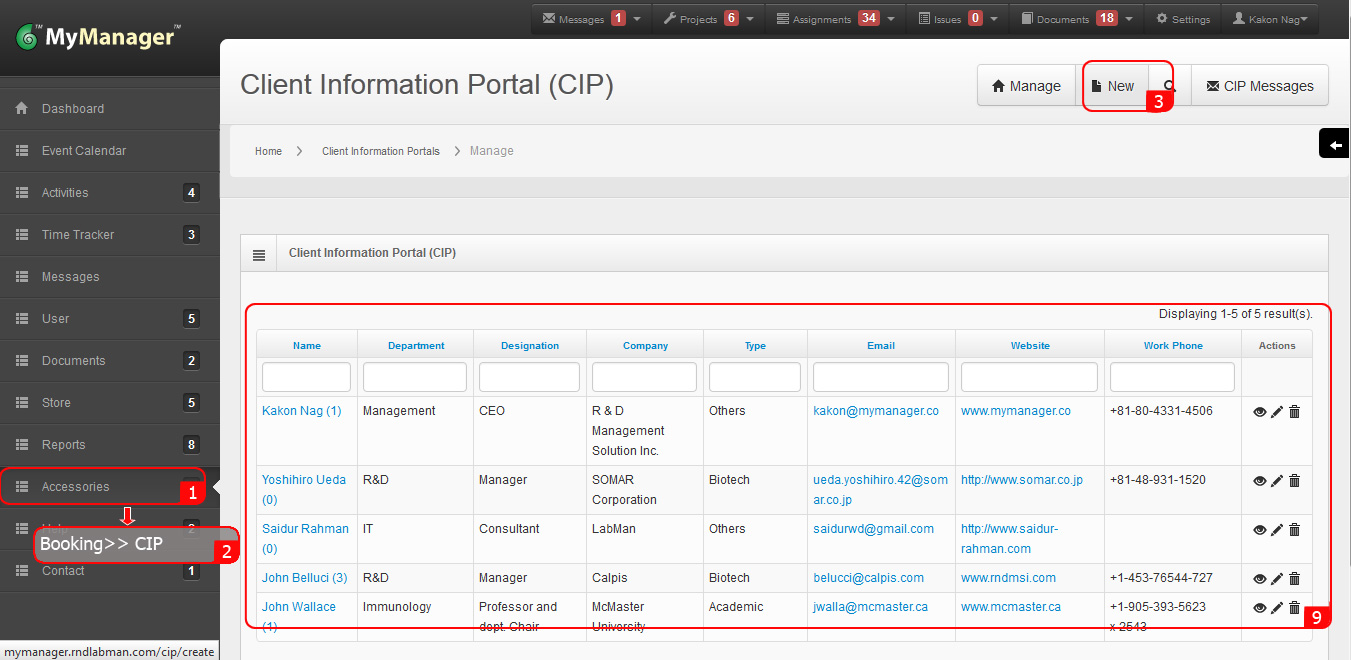
4. Fill the form for General Information for a client. If there is no suitable choice in the drop down fields please contact us with your desired choice.
5. Fill the form for Primary Information.
6. Fill the form for Administrative information.
a. Fill the Interest field with the relevant information for a client. So that the client can be managed efficiently.
b. Select Client Type from the drop down menu.
c. Select relevant person, who will be responsible for managing this client from the drop down menu of Assigned To.
d. Keep special note or remarks for efficient management of the relevant client.
7. Fill the form for Social Media information.
8. Click Create button at the bottom of the page.
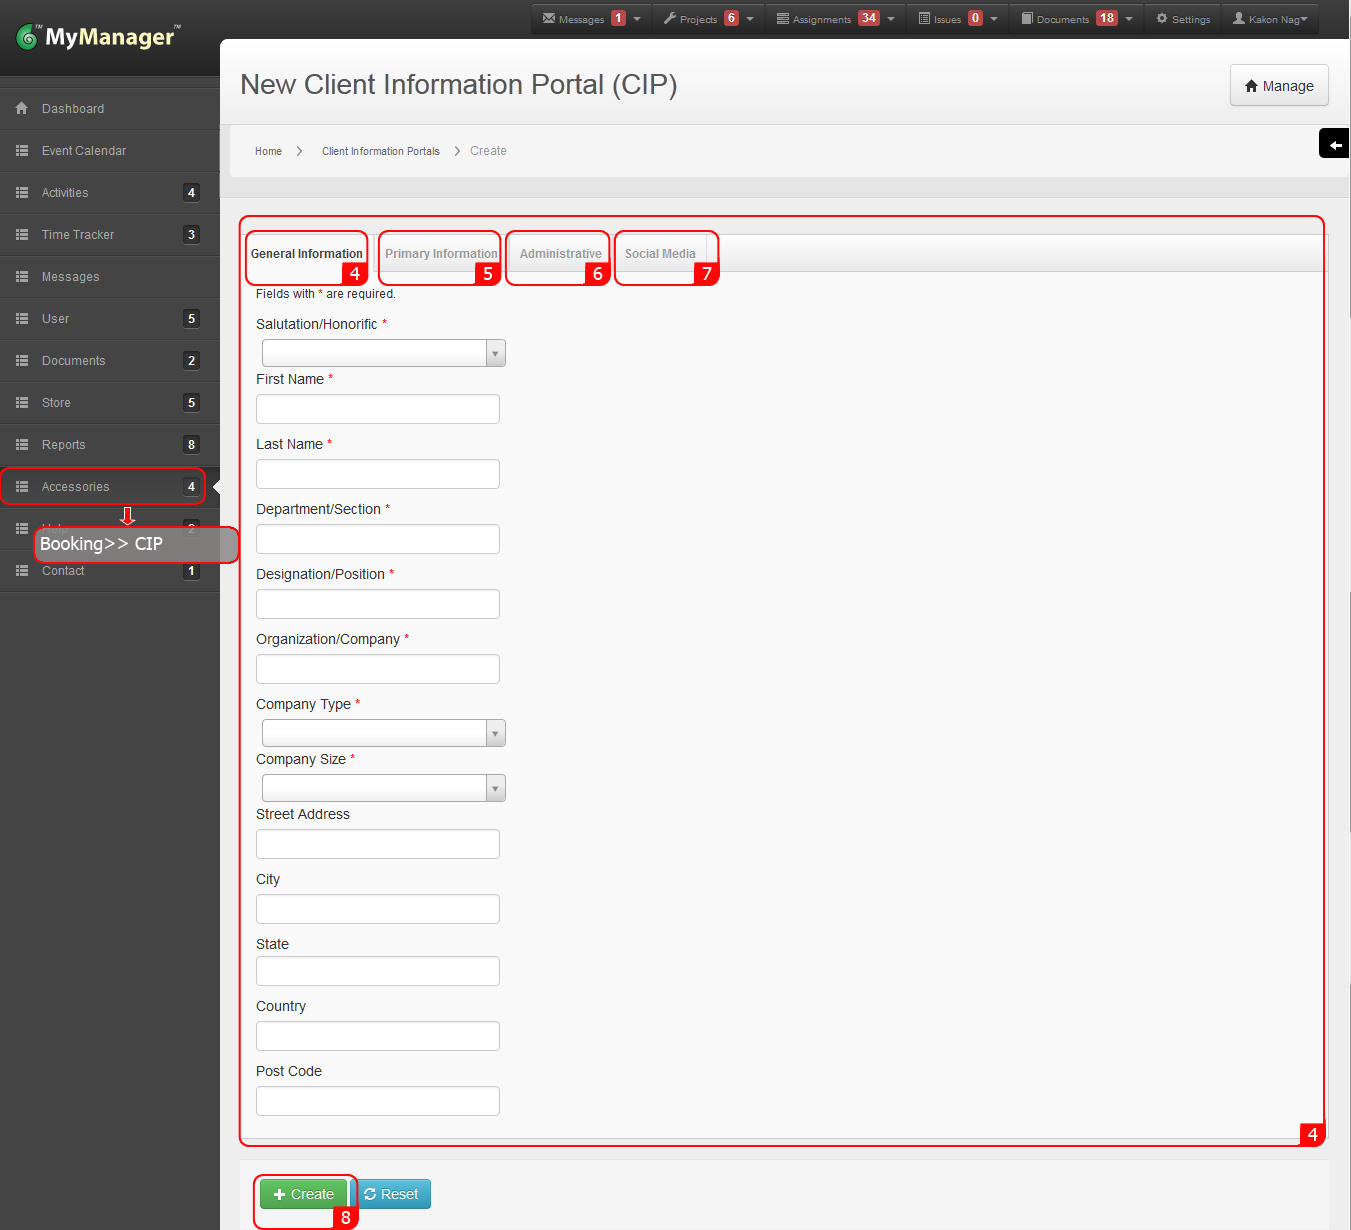
1. Rollover the cursor on Accessories tab at left menu bar and click.
2. Click on Client Info Portal (CIP) tab.
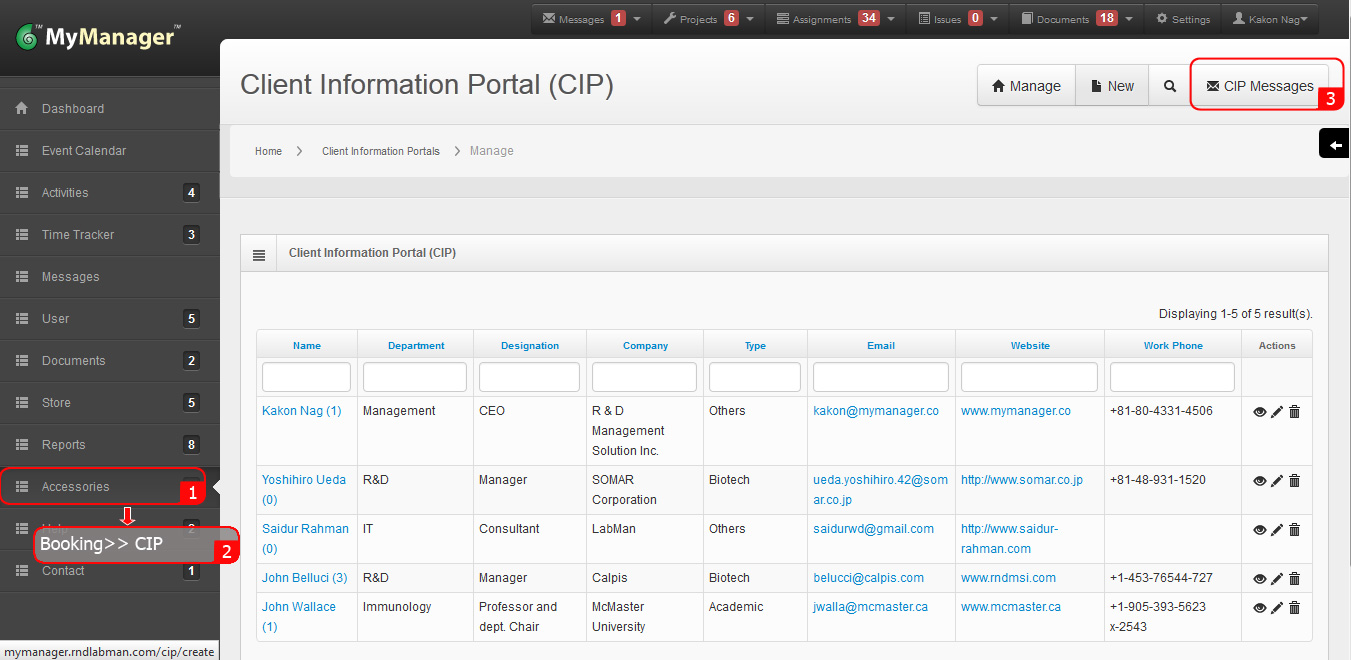
3. You will see the Client Information Portal (CIP) table.
5. To send a message to a client click on the email address.
6. To see the relevant webpage for a client click on the webpage link.
7. To edit or update relevant information, click on the Update (pencil icon) in the Action column.
8. To delete information for a client click Delete (waste basket icon) in the Action column.
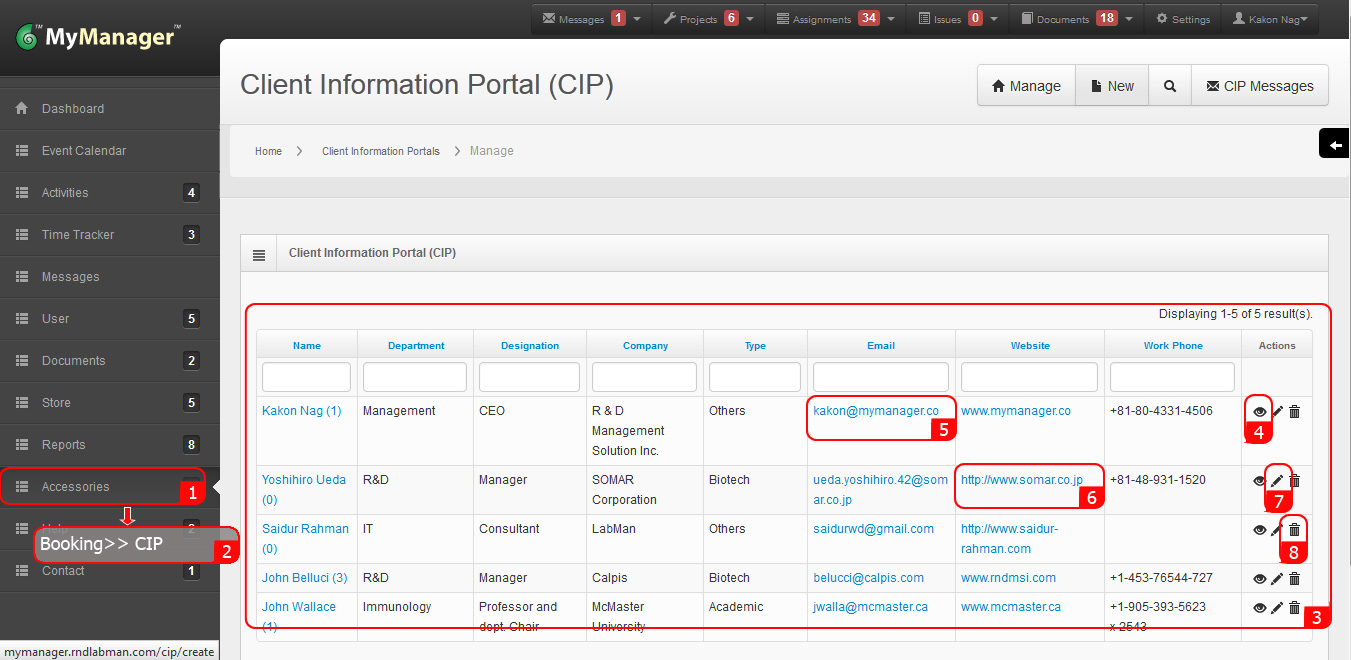
1. Rollover the cursor on Accessories tab at left menu bar and click.
2. Click on Client Info Portal (CIP) tab.
3. Click CIP Messages at the top right of the screen.
4. Click New at the top right.
5. Fill the Title and Details section with your desired content.
7. A new CIP message will be created.
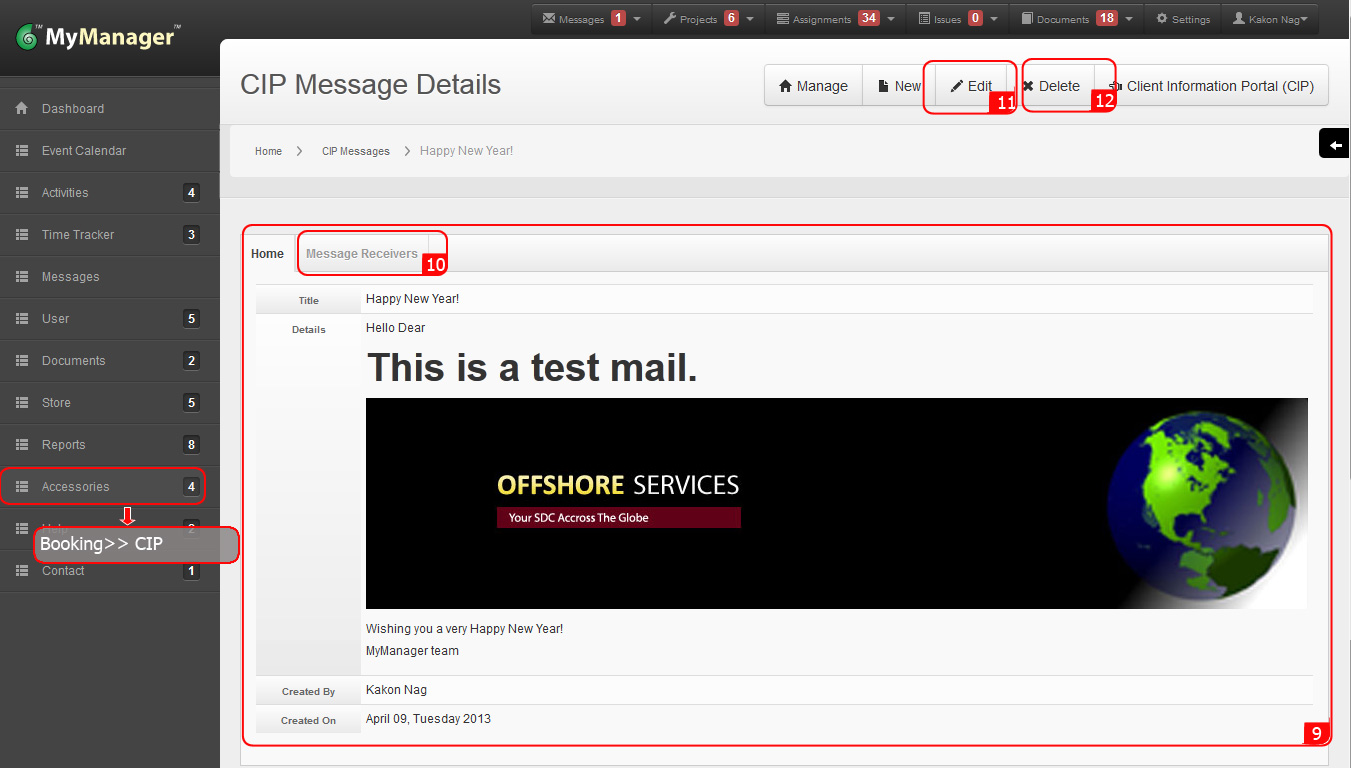
9. See the details of the message.
10. Click Message Receivers to see the history for the message sent.
11. To edit or update relevant information, click on the Update (pencil icon) in the Action column.
12. To delete information for a client click Delete (waste basket icon) in the Action column.
1. Rollover the cursor on Accessories tab at left menu bar and click.
2. Click on Client Info Portal (CIP) tab.
3. Click CIP Messages at the top right of the screen.
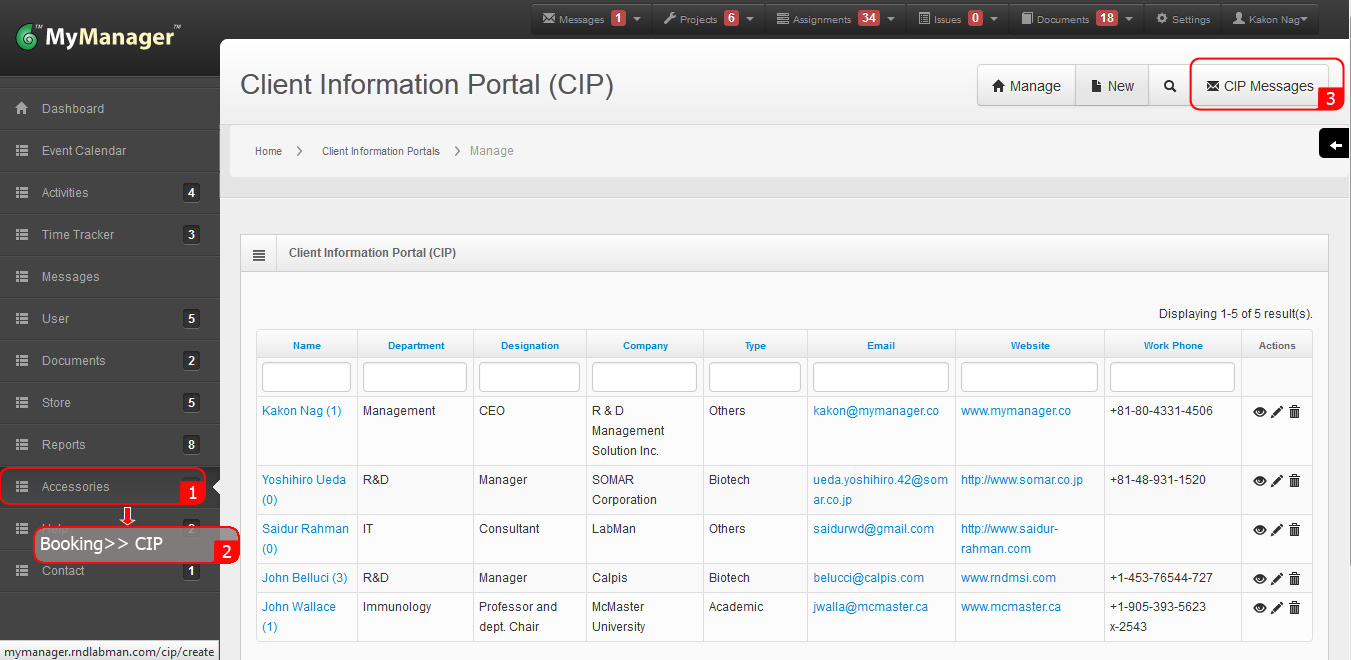
4. Click New at the top right.
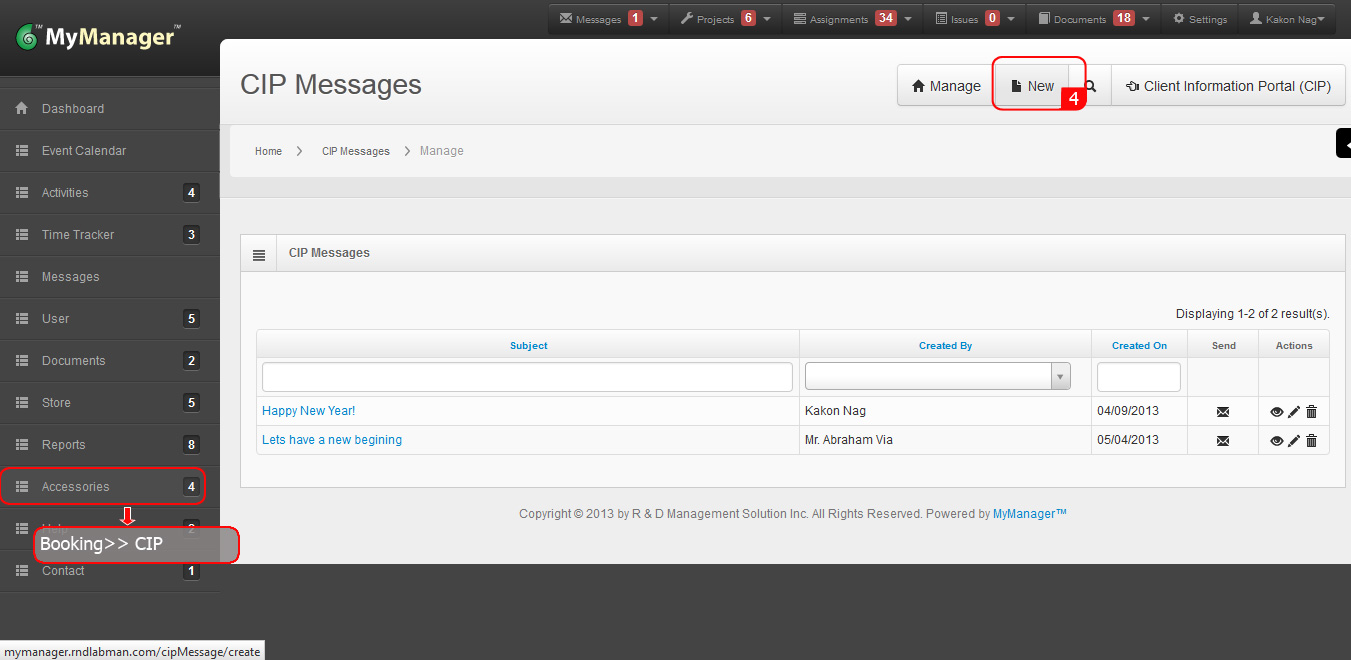
5. Fill the Title and Details section with your desired content.
6. Click Create.
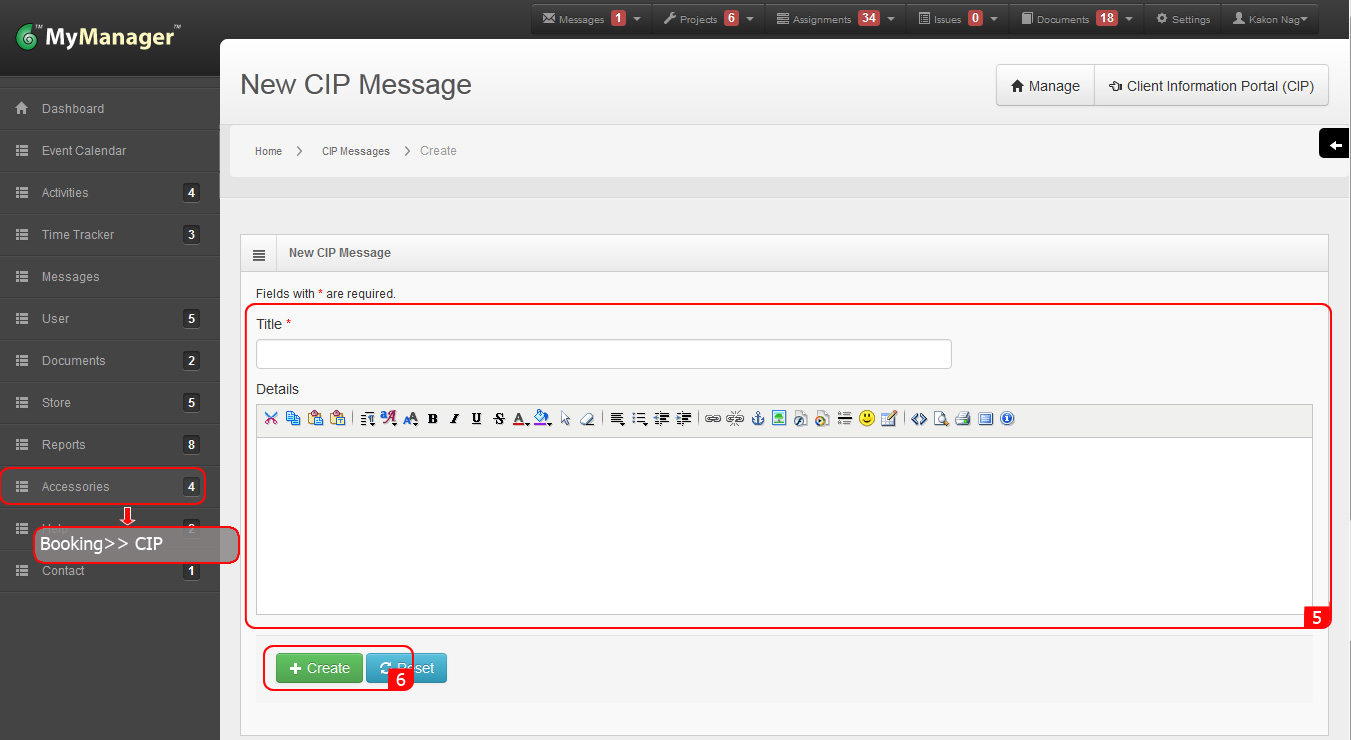
7. A new CIP message will be created.
8. To see the detail of the message either click on the Subject field or on View (eye icon) in the Action column.
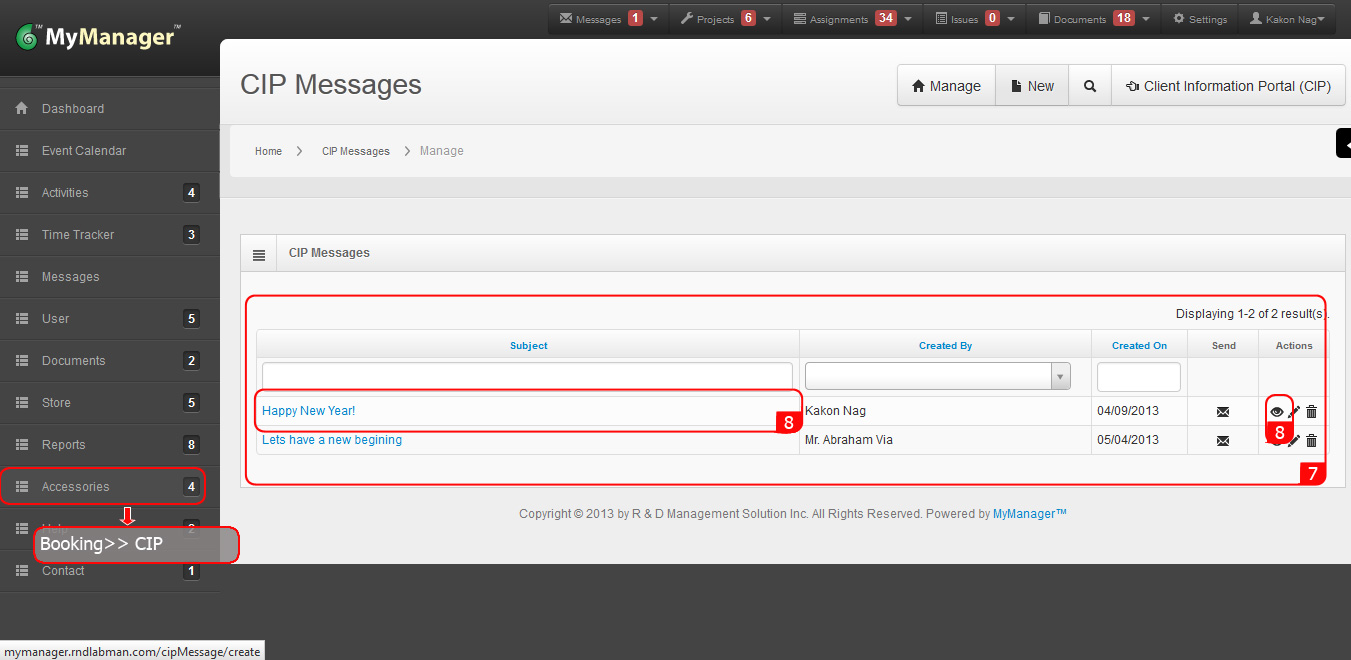
9. See the details of the message.
10. Click Message Receivers to see the history for the message sent.
11. To edit or update relevant information, click on the Update (pencil icon) in the Action column.
12. To delete information for a client click Delete (waste basket icon) in the Action column.
1. Rollover the cursor on Accessories tab at left menu bar and click.
2. Click on Client Info Portal (CIP) tab.
3. Click CIP Messages at the top right of the screen.
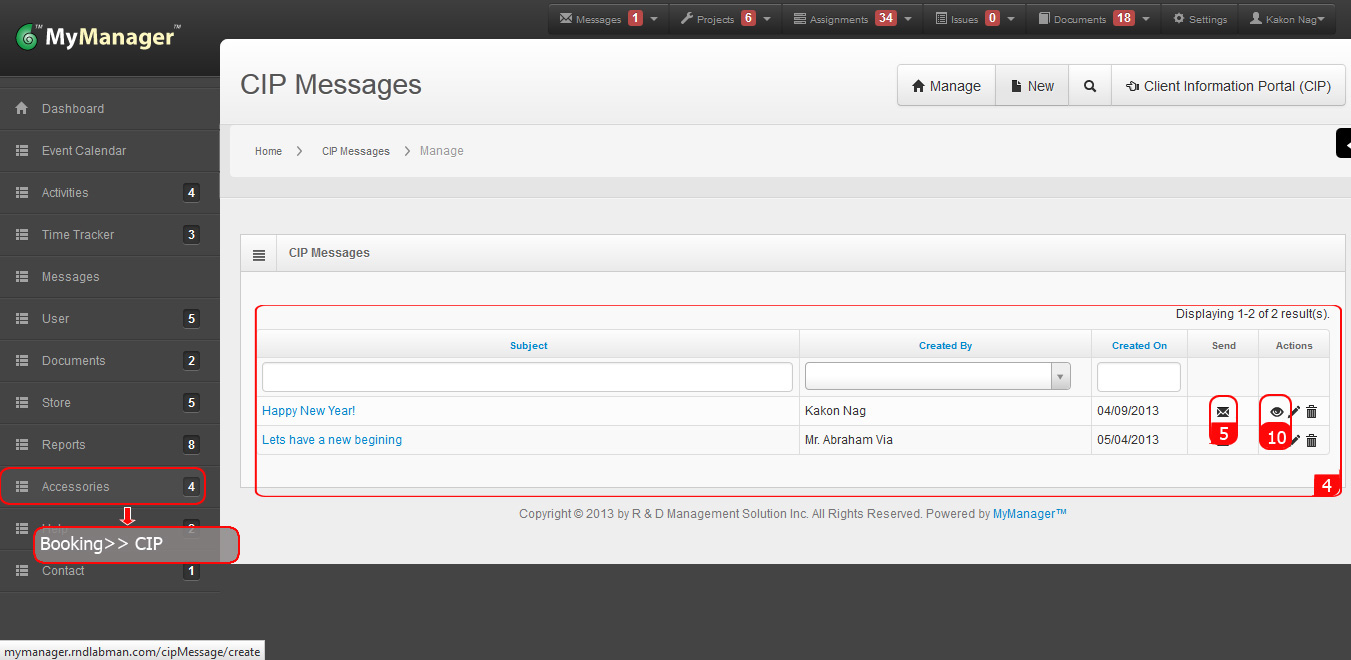
4. Check the CIP message table and identify the message you wish to send to one or multiple clients.
5. Click the Envelope icon in the Send column for the relevant message.
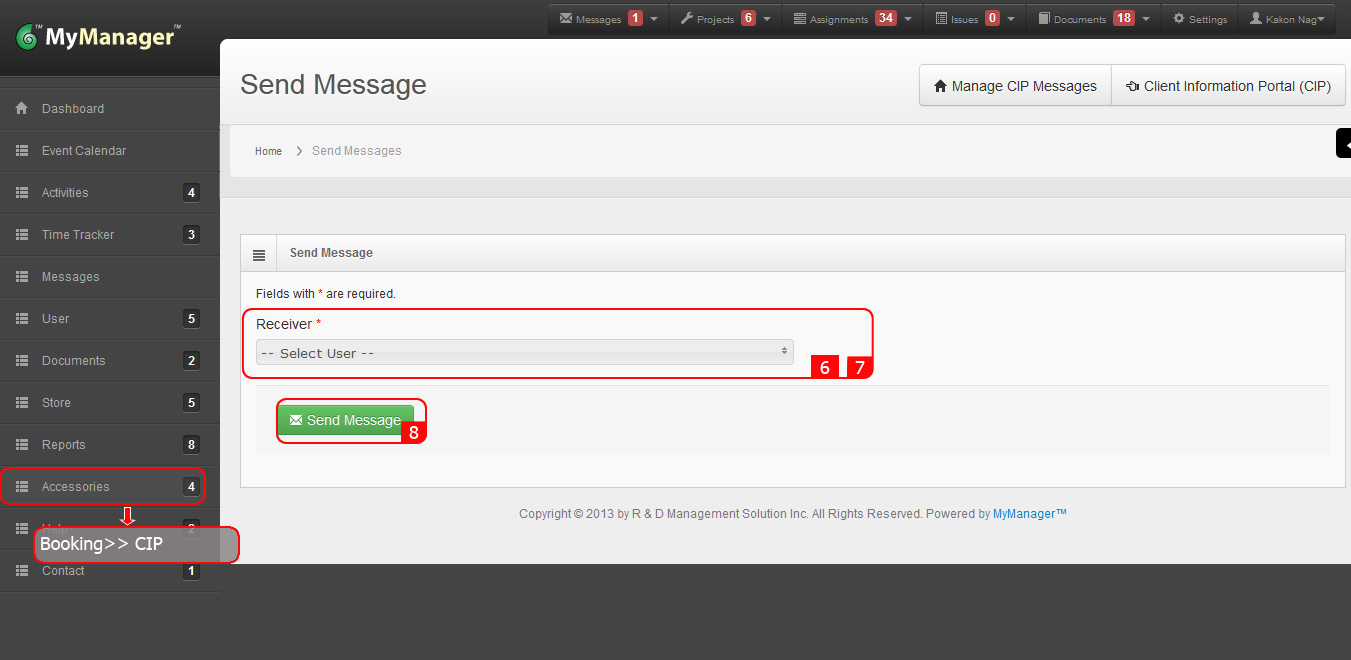
6. Select desired receiver from the drop down list.
9. The selected message will be immediately send to the selected receiver/s.
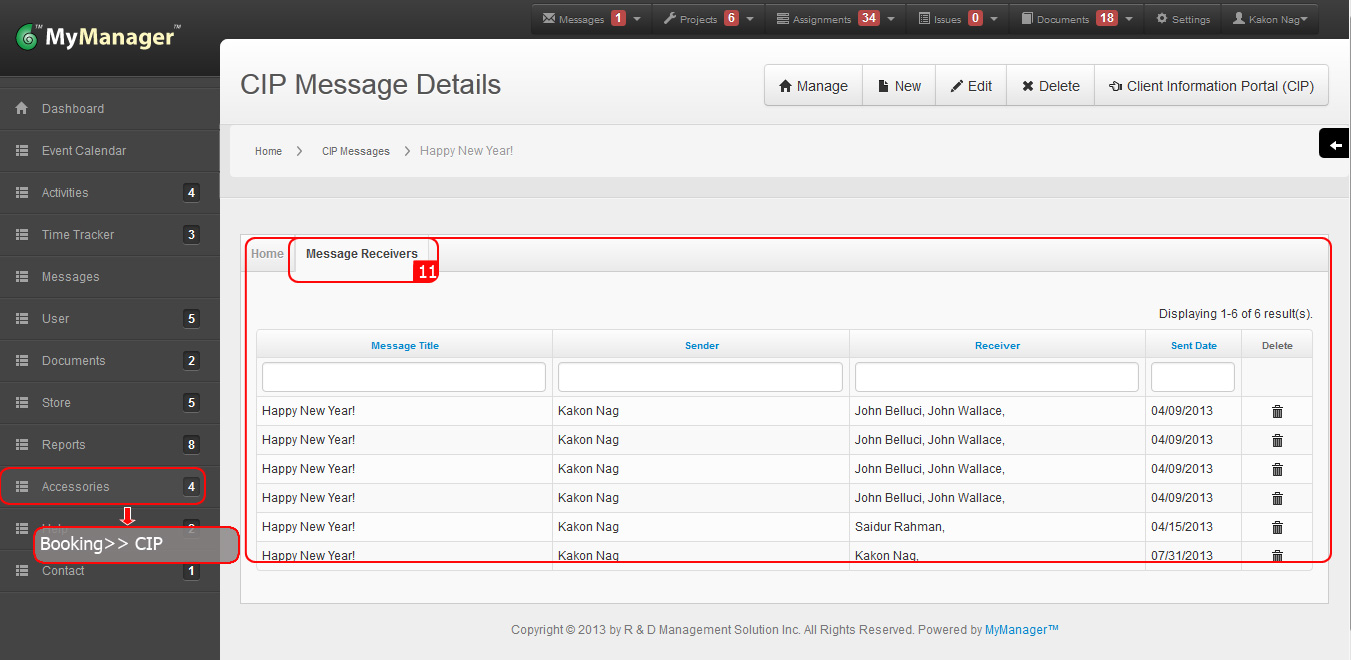
11. Click Message Receivers to see the history for the message sent.
1. Rollover the cursor on Accessories tab at left menu bar and click.
2. Click on Client Info Portal (CIP) tab.
3. Click CIP Messages at the top right of the screen.
4. Check the CIP message table and identify the message you wish to send to one or multiple clients.
5. Click the Envelope icon in the Send column for the relevant message.....
10. To check the history for any message sending activities, click on View (eye icon) in the Action column.
6. Select desired receiver from the drop down list.
7. By clicking Check all you can select all receivers in the list. Uncheck all will release all selections.
8. Click Send Message.
11. Click Message Receivers to see the history for the message sent.
1. Rollover the cursor on Accessories tab at left menu bar and click.
2. Click on Client Info Portal (CIP) tab.
3. You will see the Client Information Portal (CIP) table.
4. Click on View (eye icon) in the Action column.
5. Click Correspondence to see the history of communication for the specific client.
6. Click New Correspondence to create new communication history information.
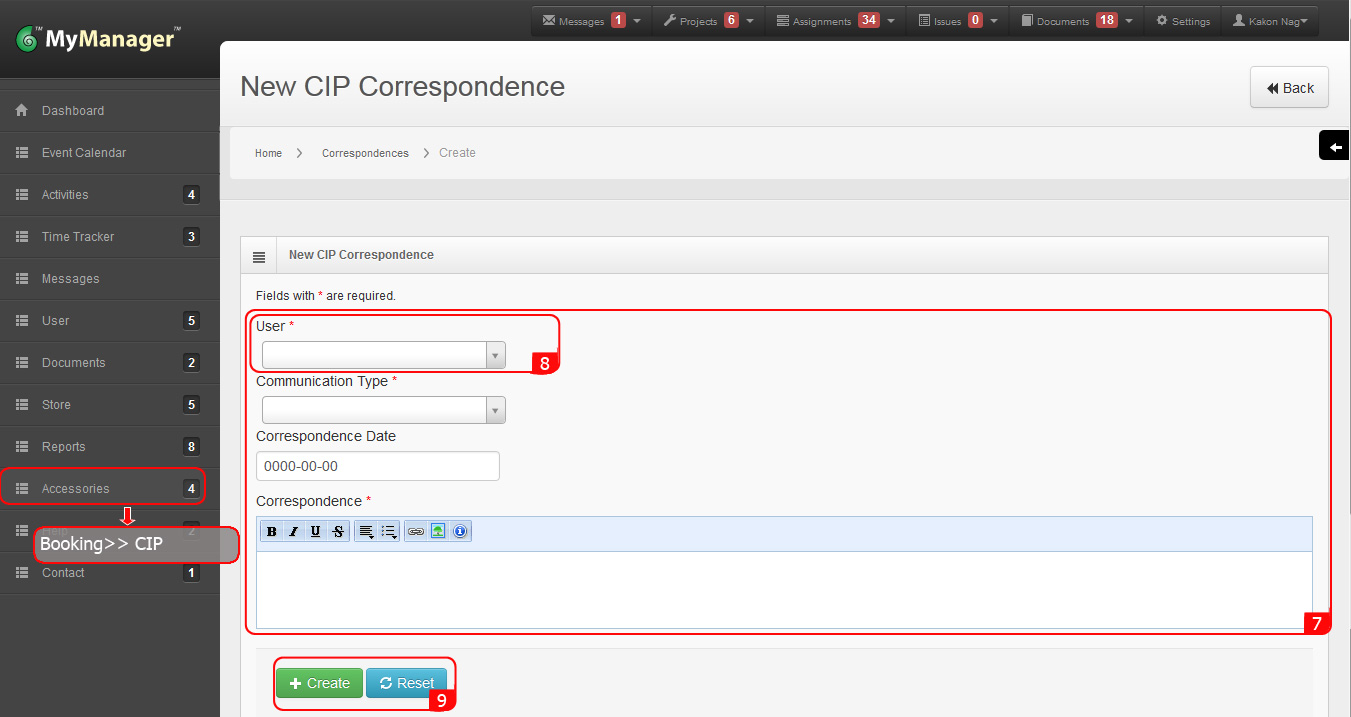
8. Select the communicator from the drop down list shown in User field.
10. New correspondence activity history will be created.
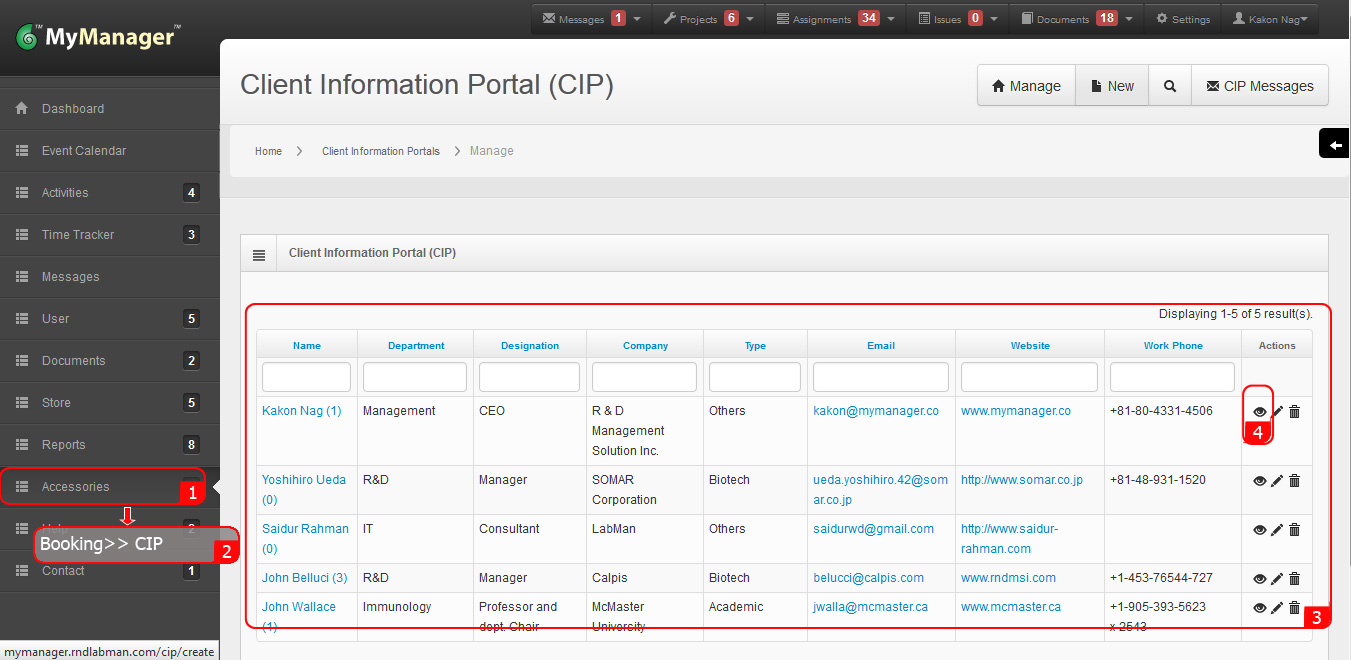
1. Rollover the cursor on Accessories tab at left menu bar and click.
2. Click on Client Info Portal (CIP) tab.
3. You will see the Client Information Portal (CIP) table.
4. Click on View (eye icon) in the Action column.
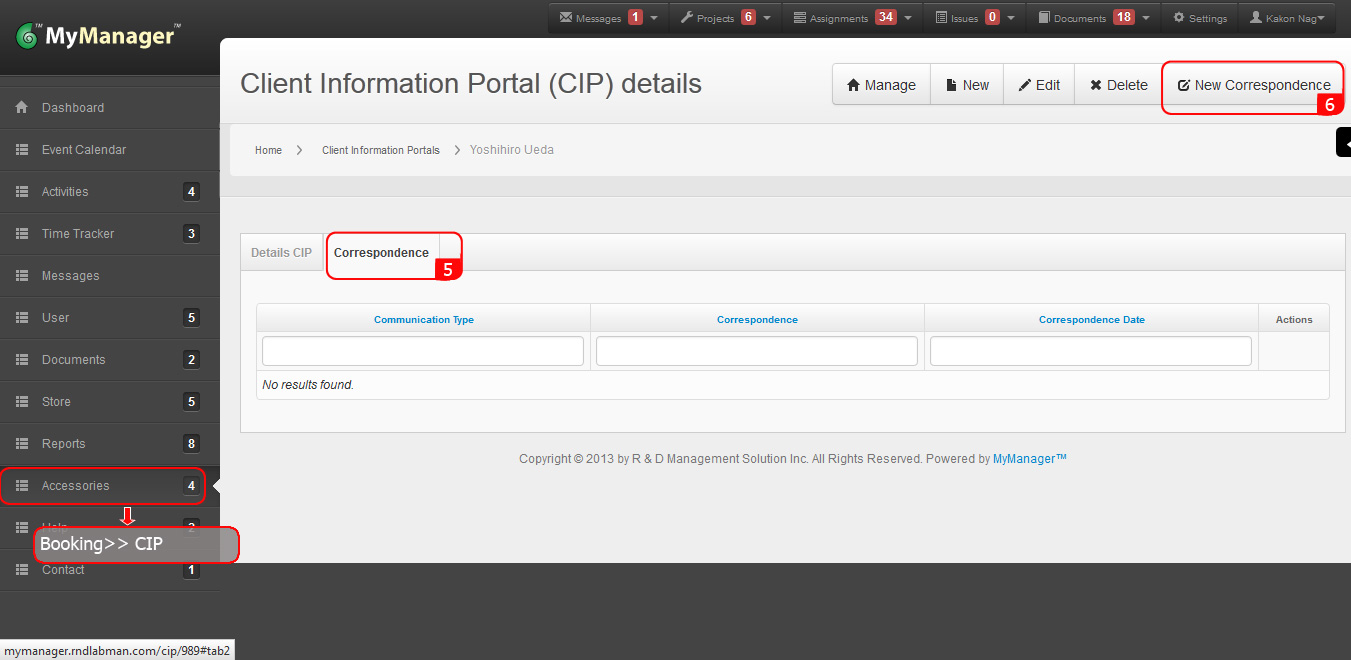
5. Click Correspondence to see the history of communication for the specific client.
6. Click New Correspondence to create new communication history information.
7. Fill the form.
8. Select the communicator from the drop down list shown in User field.
9. Click Create.
