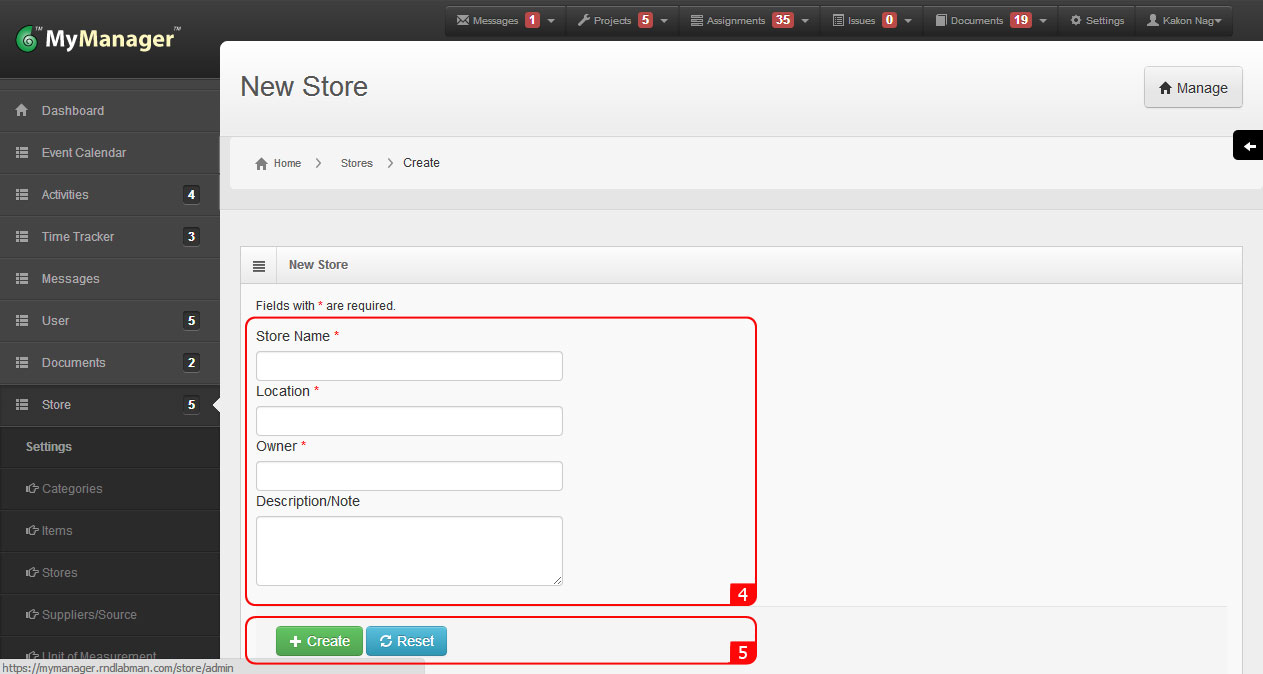
Store Setting
1. Rollover the cursor on Store tab on top menu bar.
2. Rollover the cursor on Settings tab and click on Items.
3. Click Create Item button under the Operations tab at right side.
6. Fill Item Name and relevant Catalog Number.
10. Provide the existing quantity of the Item in Initial Qty. field.
12. Provide the unit price for the Item.
13. Select date stocked. If you do not have exact date information you can provide current date.
14. Provide the Lot Name information from the label of the Item.
1. Rollover the cursor on Store tab on top menu bar.
2. Rollover the cursor on Settings tab and click on Items.
3. Click Create Item button under the Operations tab at right side.
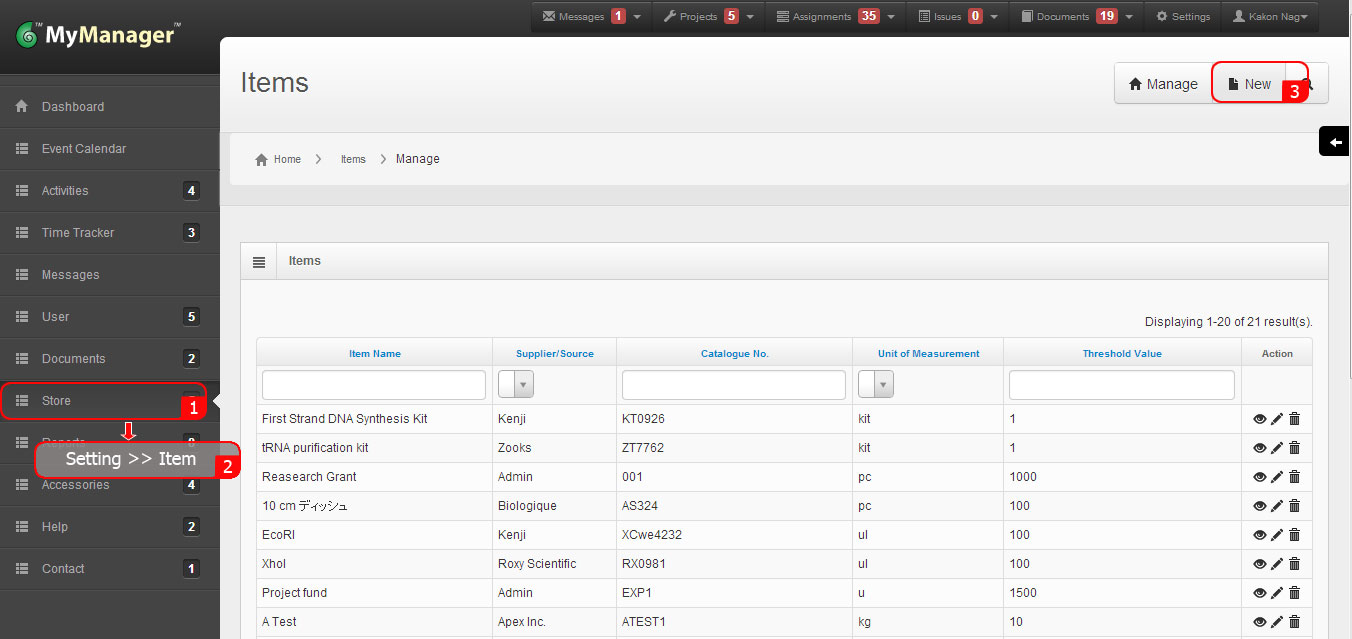
4. Select the Supplier for the Item from the drop down list. For creating New Supplier click on the adjacent New Supplier tab, and follow instructions in section Creating a Supplier.
5. Select the Category for the Item from the drop down list. For creating New Category click on the adjacent New Category tab, and follow instructions in section Creating a Category.
6. Fill Item Name and relevant Catalog Number.
7. Select the Unit of Measurement for the Item from the drop down list. For creating New Unit of Measurement click on the adjacent New UoM tab, and follow instructions in section Creating Unit of Measurement (UoM).
8. Provide the Minimum Storage Limit (Threshold Value) amount for the Item. If the current stock is over this limit then the R&D-LabMan™ will not allow users to create new Purchase Order to protect against redundant/excess purchase unless permitted by the supervisor. Supervisor can create any purchase order.
9. If you have existing stock/s for the Item then click on the Existing Stock box, otherwise directly move to point 16.
10. Provide the existing quantity of the Item in Initial Qty. field.
11. Select the desired Store for the Item from the drop down list. For creating New Store click on the adjacent New Store tab, and follow instructions in section Create Store.
12. Provide the unit price for the Item.
13. Select date stocked. If you do not have exact date information you can provide current date.
14. Provide the Lot Name information from the label of the Item.
15. Select Expiry Date. The information is generally printed on the label or on the package of the Item.
16. Select Item Status Active. Selecting Item Status Inactive will make the Item disappear from general user.
17. Provide necessary information (for example,storage condition, safety code, disposal protocol code etc.) in Summery/Note field.
18. Click Choose File to upload relevant Documents, for example, MSDS, Technical Data Sheet, Certificate of Analysis etc. Maximum 5 Documents can be chosen.
19. Click Create.
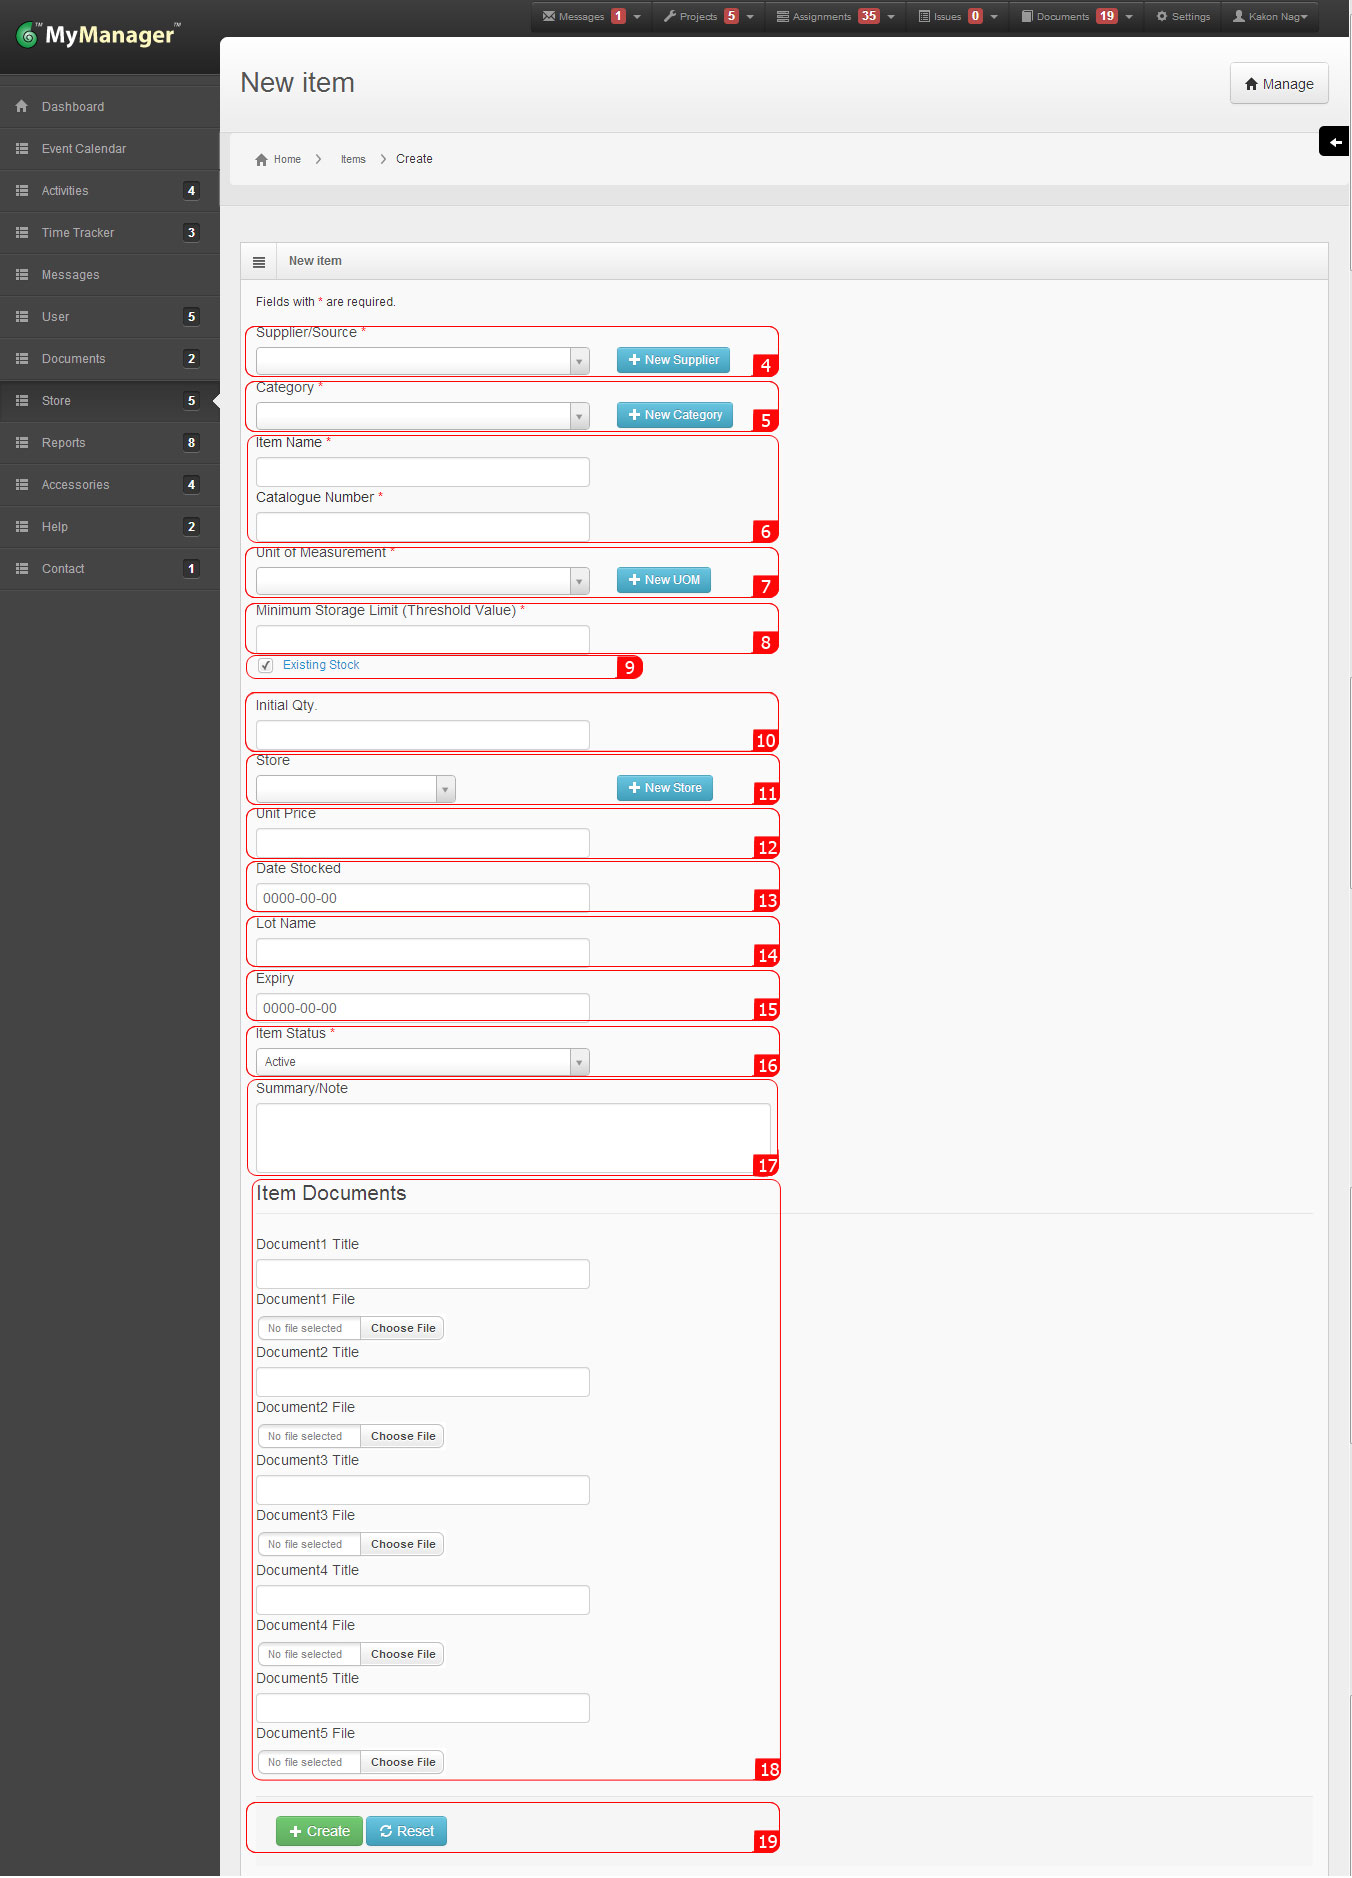
1. Rollover the cursor on Store tab on top menu bar.
2. Rollover the cursor on Settings tab and click on Suppliers.
3. Click Create Supplier button under the Operations tab at right side.
1. Rollover the cursor on Store tab on top menu bar.
2. Rollover the cursor on Settings tab and click on Suppliers.
3. Click Create Supplier button under the Operations tab at right side.
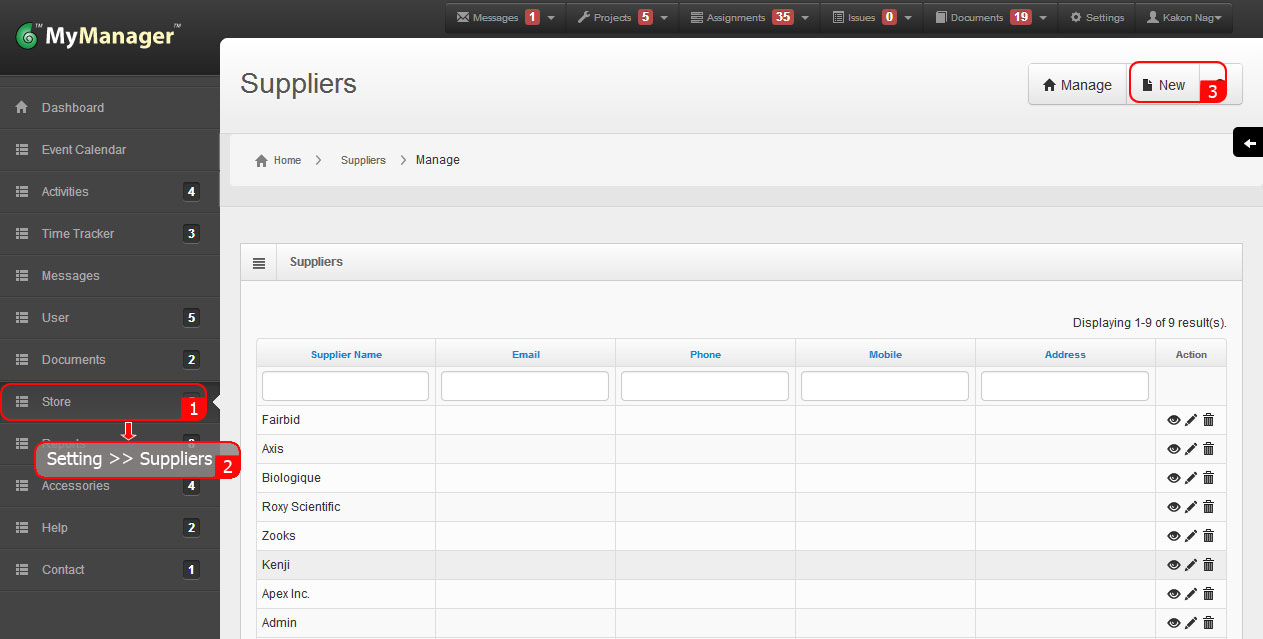
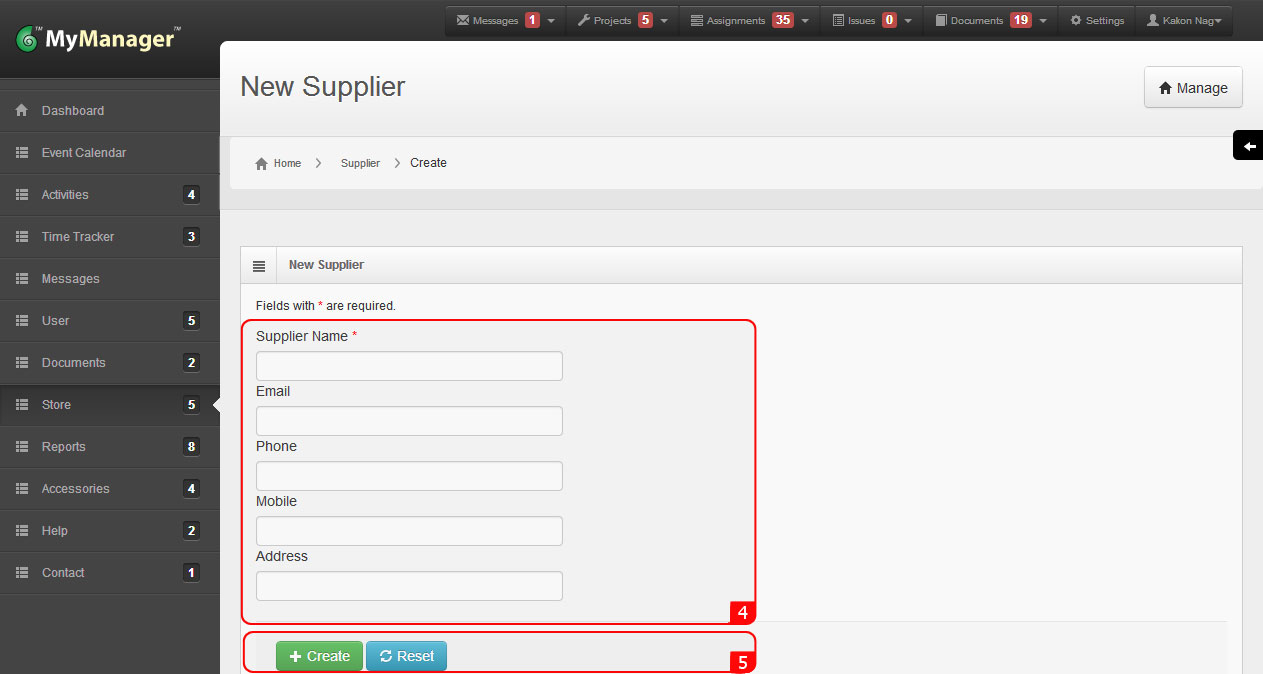
4. Fill the form.
5. Click Create.
A Default Category list is available for your quick use. Please check the list and if you need New Category then proceed for creating a New Category. You can create unlimited New Categories and Subcategories (under these New Categories) but you cannot create a Subcategory under the Default Category list. You can use a different name for your desired Category if a similar Category already exists in the Default Category list; for example, the new Chemical Category can be named as Chemical-1. If you definitely need a Subcategory under a Default Category please contact us with your requirement and we will create it.
1. Rollover the cursor on Store tab on top menu bar.
2. Rollover the cursor on Settings tab and click on Categories.
3. Check the Category list for your desired Category or Subcategory.
5. For creating a Subcategory click in the selection box at the top of the form beside Subcategory.
6. Select desired Category from the drop down list of Parent Category.
1. Rollover the cursor on Store tab on top menu bar.
2. Rollover the cursor on Settings tab and click on Categories.
3. Check the Category list for your desired Category or Subcategory.
4. For creating a new Category or Subcategory click Create New Category under the Operations tab at right side.
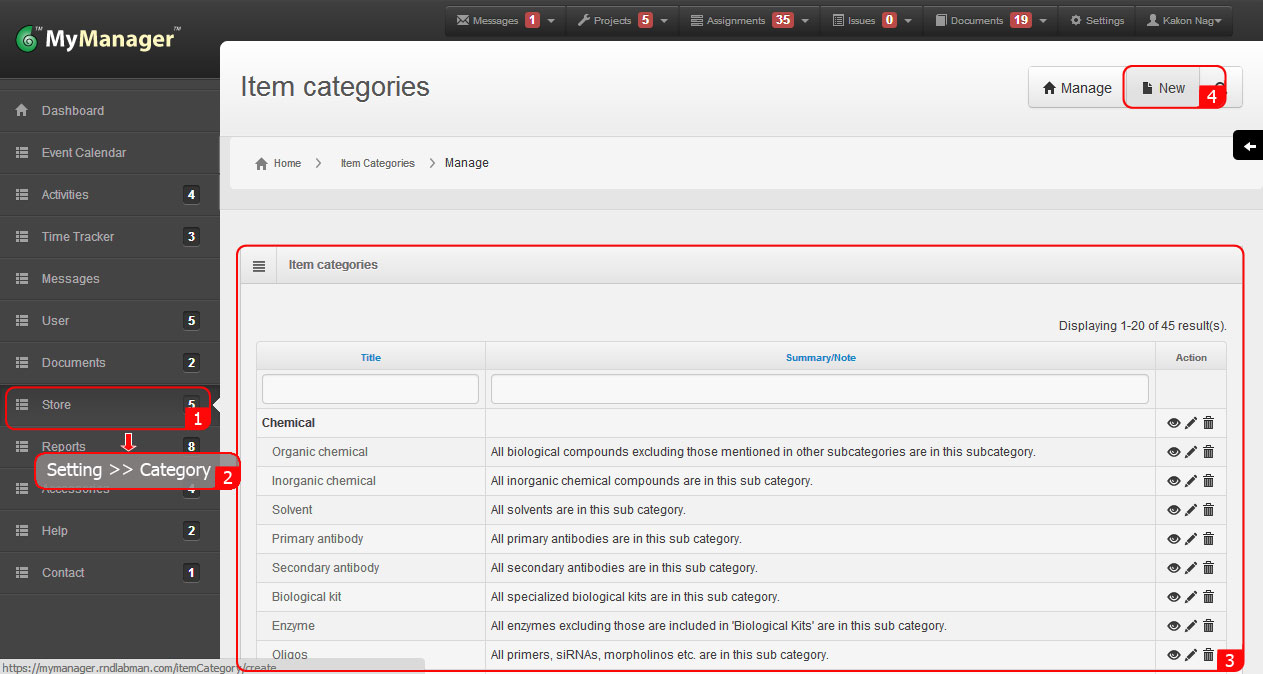
5. For creating a new Category or Subcategory click Create New Category under the Operations tab at right side.
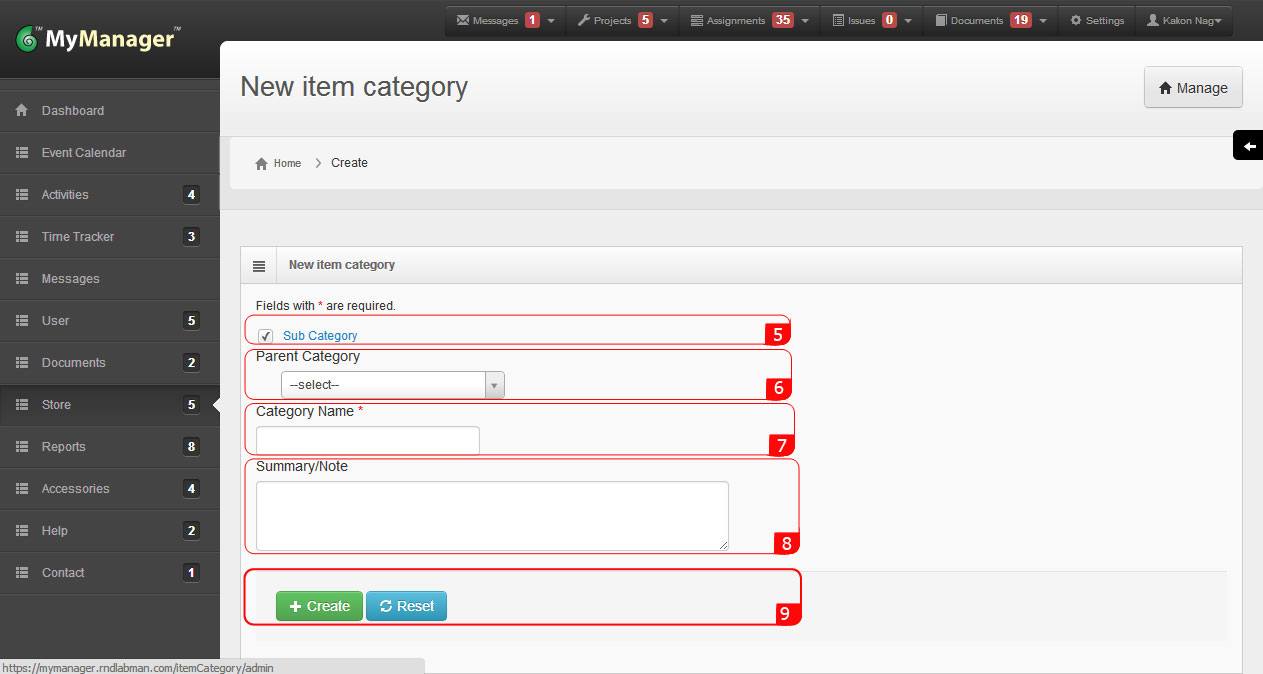
6. For creating a Subcategory click in the selection box at the top of the form beside Subcategory.
7. Select desired Category from the drop down list of Parent Category.
8. Fill the form.
9. Click Create.
A Default Unit of Measurement (UoM) list is available for your quick use. Please check the list and if you need New Unit of Measurement then proceed for creating a new Unit of Measurement. You can create unlimited Unit of Measurement.
1. Rollover the cursor on Store tab on top menu bar.
2. Rollover the cursor on Settings tab and click on Unit of Measurement.
3. Check the default list for your desired unit.
1. Rollover the cursor on Store tab on top menu bar.
2. Rollover the cursor on Settings tab and click on Unit of Measurement.
3. Check the default list for your desired unit.
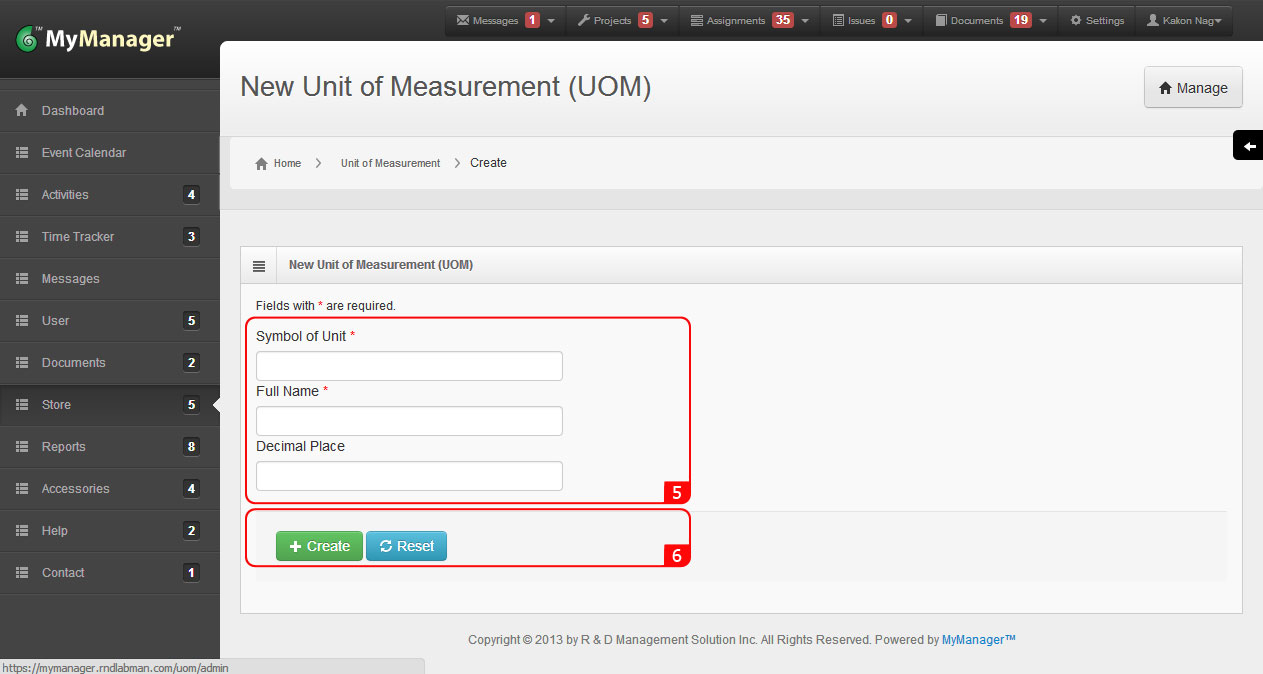
4. If you need a new unit then click Create Unit of Measurement button under the Operations tab at right side.
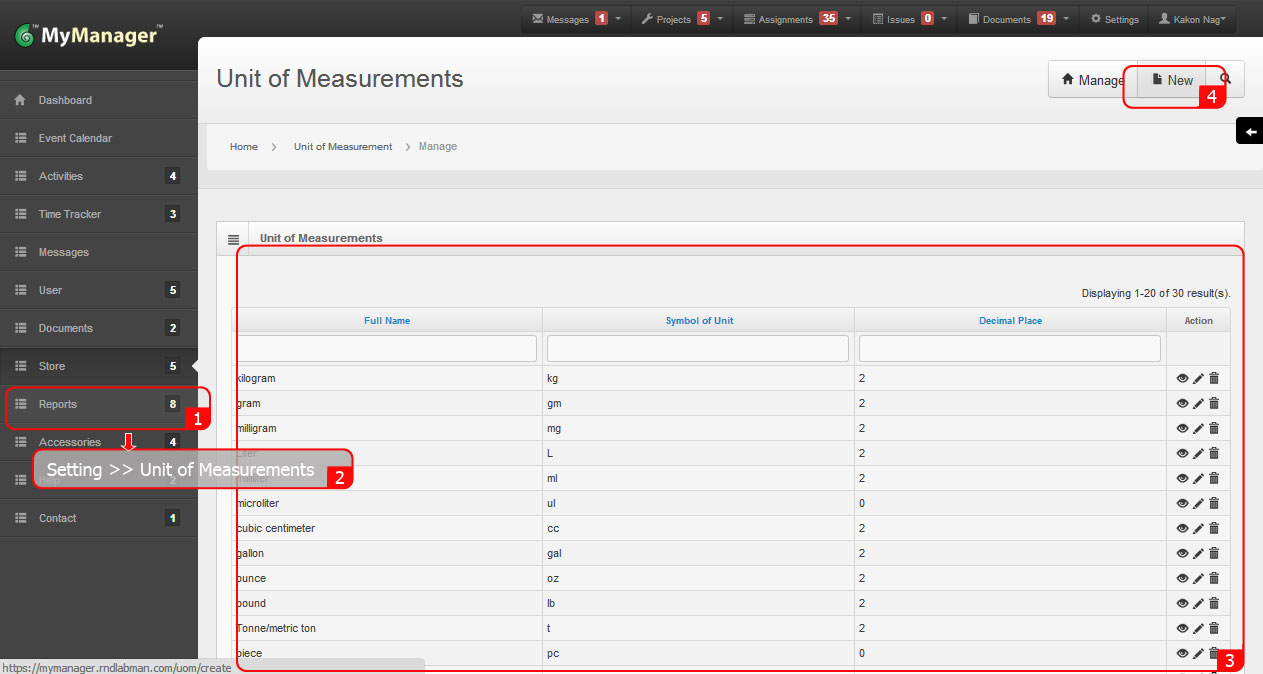
5. Fill the form.
6. Click Create.
1. Rollover the cursor on Store tab on top menu bar.
2. Rollover the cursor on Settings tab and click on Stores.
3. Click Create Store button under the Operations tab at right side.
1. Rollover the cursor on Store tab on top menu bar.
2. Rollover the cursor on Settings tab and click on Stores.
3. Click Create Store button under the Operations tab at right side.
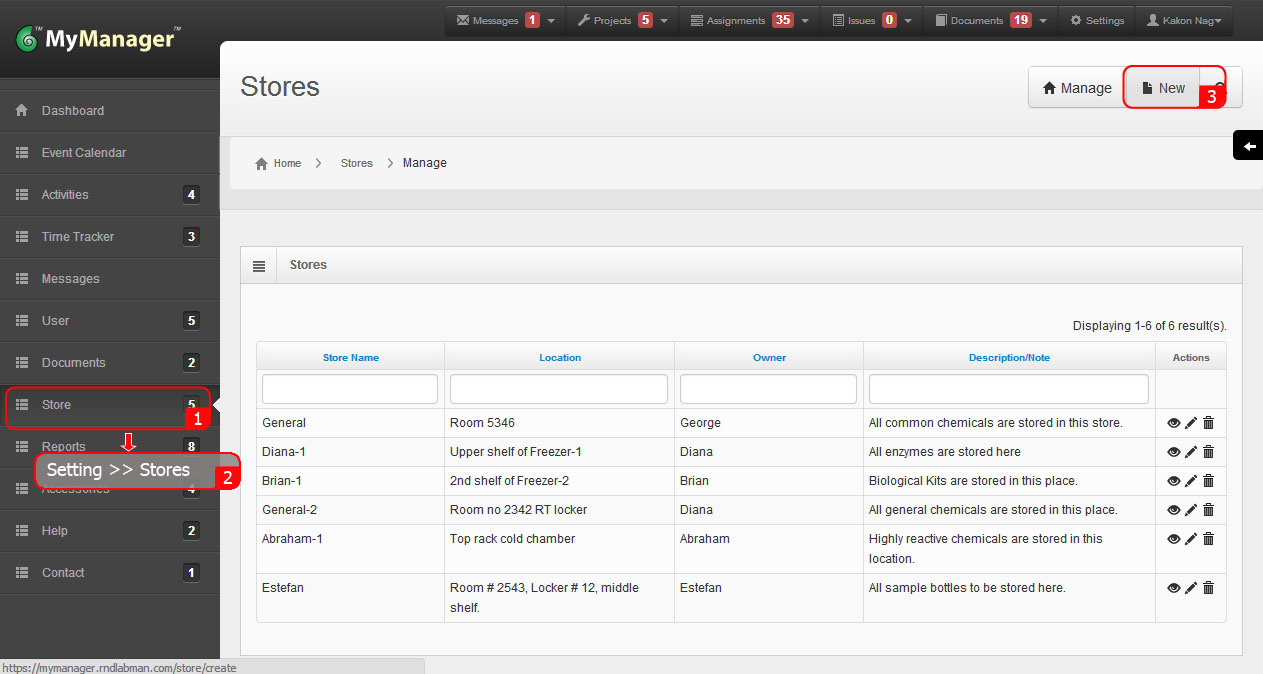
4. Fill the form.
5. Click Create.
