Project
1. Rollover the cursor on Activities at left side menu bar and click.
3. Click New at the right top corner.
8. Fill the Project Code field with an unique code of maximum 4 characters
9. Select the responsible person from the drop down menu for Owner.
10. Set estimated (Est.) start date by clicking to the Est. Start field.
11. Set estimated (Est.) end date by clicking to the Est. End field.
12. Set Actual (Act.) start date by clicking to the Act. Start field.
13. Set Actual (Act.) end date by clicking to the Act. End field.
14. Put the numerical value for the progress status of the activity in percentage.
17. Write necessary project description in the Summary field.
18. Write putative risk for this project.
19. Write about risk management plan for those putative risks.
1. Rollover the cursor on Activities at left side menu bar and click.
2. Click Projects.
3. Click New at the right top corner.
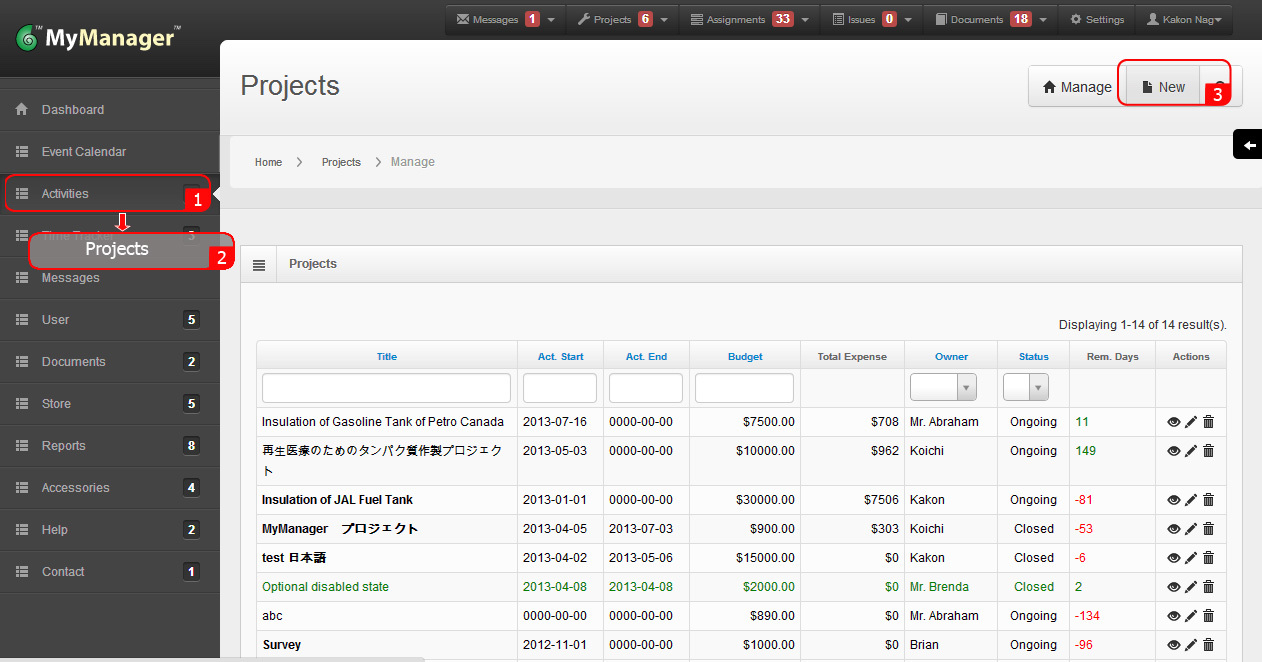
4. If this is a sub-project under a project then click on the box adjacent to the Sub Project at the top of the form.
5. Select the project under which this sub-project will be created from the drop down menu for Parent Project.
6. Select users who will have access to this project from the drop down menu for Access User. Unselected users will not see any information for this project.
7. Fill the Title field.
8. Fill the Project Code field with an unique code of maximum 4 characters.
9. Select the responsible person from the drop down menu for Owner.
10. Set estimated (Est.) start date by clicking to the Est. Start field.
11. Set estimated (Est.) end date by clicking to the Est. End field.
12. Set Actual (Act.) start date by clicking to the Act. Start field.
13. Set Actual (Act.) end date by clicking to the Act. End field.
14. Use the progress field to mention the project progress.
15. Provide suitable value in Budget field. If you don’t have actual budget information for the project then provide a putative value. This value will be used for benchmarking progress of the project.
16. Select the desired project status from the drop down menu for Status. If it is in planning phase then select New, and if it is starting immediately then select Ongoing.
17. Write necessary project description in the Summary field.
18. Write putative risk for this project.
19. Write about risk management plan for those putative risks.
20. Click Create.
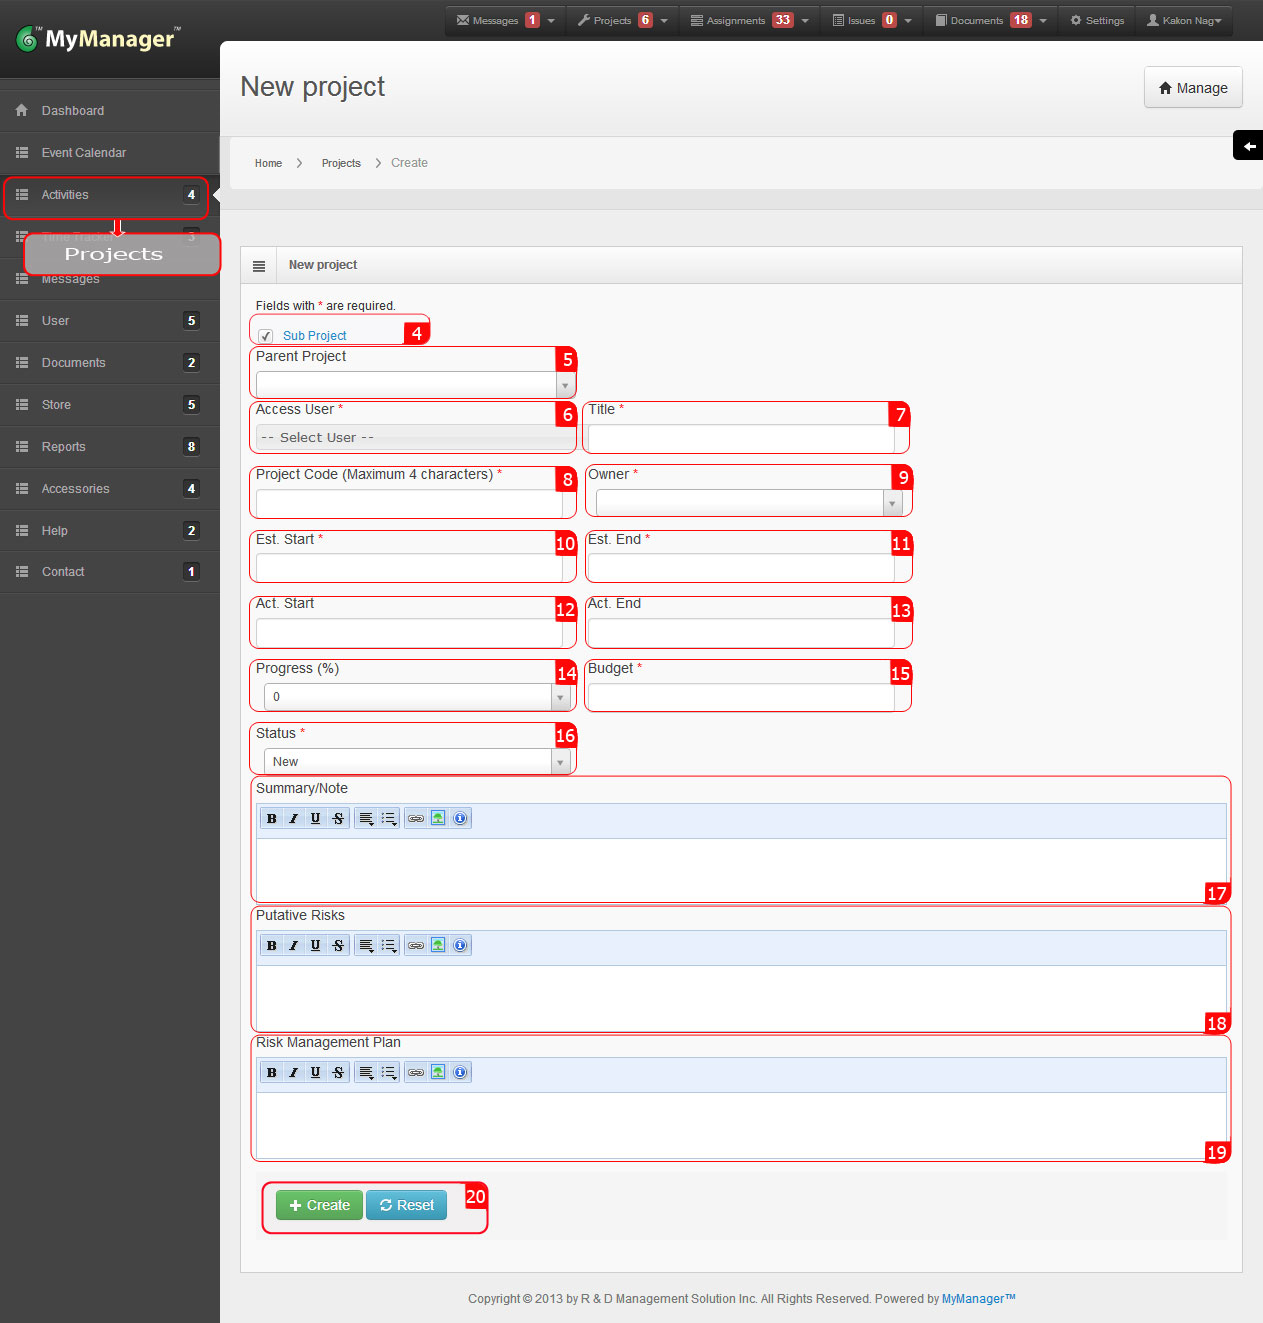
1. Rollover the cursor on Activities at left side menu bar and click.
3. Click eye icon under action header to view details of a project.
5. Click sub-project tab to see all child/sub-project of a parent project.
6. Click Assignment tab to see all the assignments and their status related to the project.
10. Click Time Tracker to see all activities by time and date information of this project.
11. Click Booking tab to see, is there any Equipment Booking records on this project.
12. Click Message tab to see message history against this project.
13. Click Issues tab to see any issue recorded against this project.
14. Click History tab to see all history of this project.
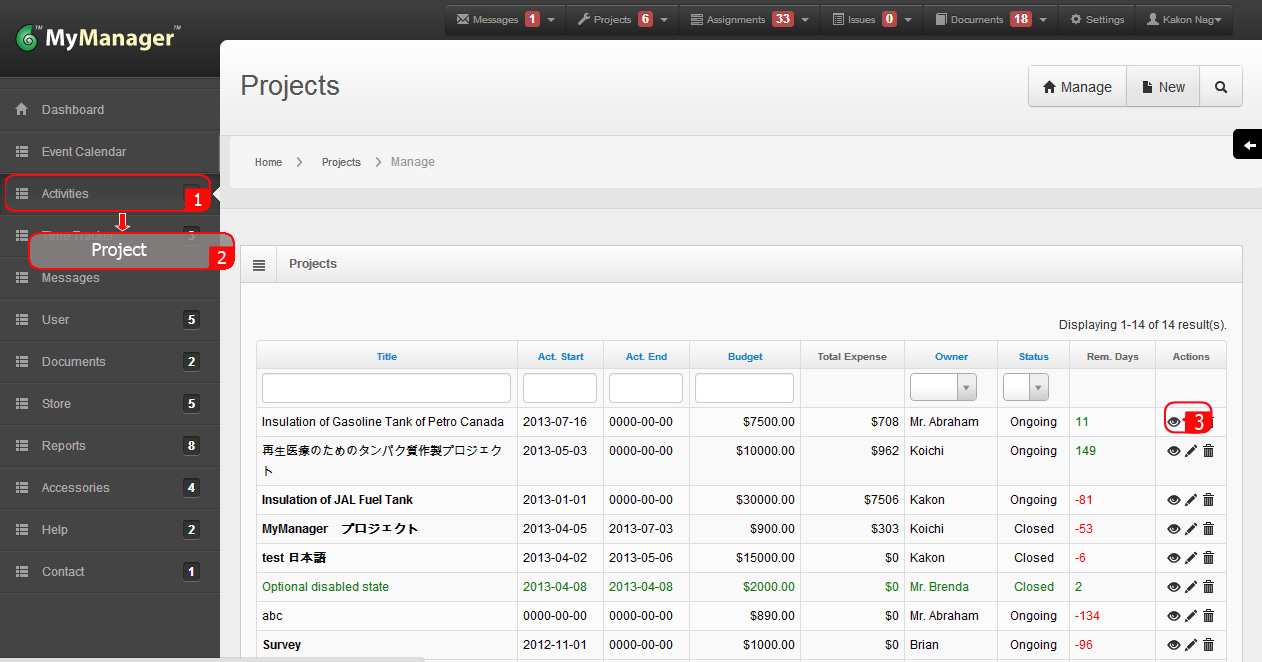
1. Rollover the cursor on Activities at left side menu bar and click.
2. Click Project.
3. Click the eye icon under action header to see details of this Project.
4. Click Project Details tab to check all the general information for the project. This includes, project title, estimated start date, estimated end date, actual start date, actual end date, budget, project owner, summary, project status, project acceptance status, total number of subprojects and assignments under the project, and allowed users who have access to the project data.
5. Click sub-project tab to see all child/sub-project of a parent project.
6. Click Assignment tab to see all the assignments and their status related to the project.
7. Click Performance tab to check the performance information of the project. This include primary budget, how much money is already consumed by the project, how much time left or passed for the project to complete, acceptance status of the project, required budget for the project based on CPI, and CPI, QPI, SPI, and TPI values for the project.
8. Click Related Documents tab to find all the project-related uploaded documents. Click on the icon under download header to see any documents. For updating any document please go to the Documents section.
9. Click Consumed tab to see all the consumed materials for the project and their relevant information.
10. Click Time Tracker to see all activities by time and date information of this project.
11. Click Booking tab to see, is there any Equipment Booking records on this project.
12. Click Message tab to see message history against this project.
13. Click Issues tab to see any issue recorded against this project.
14. Click History tab to see all history of this project.
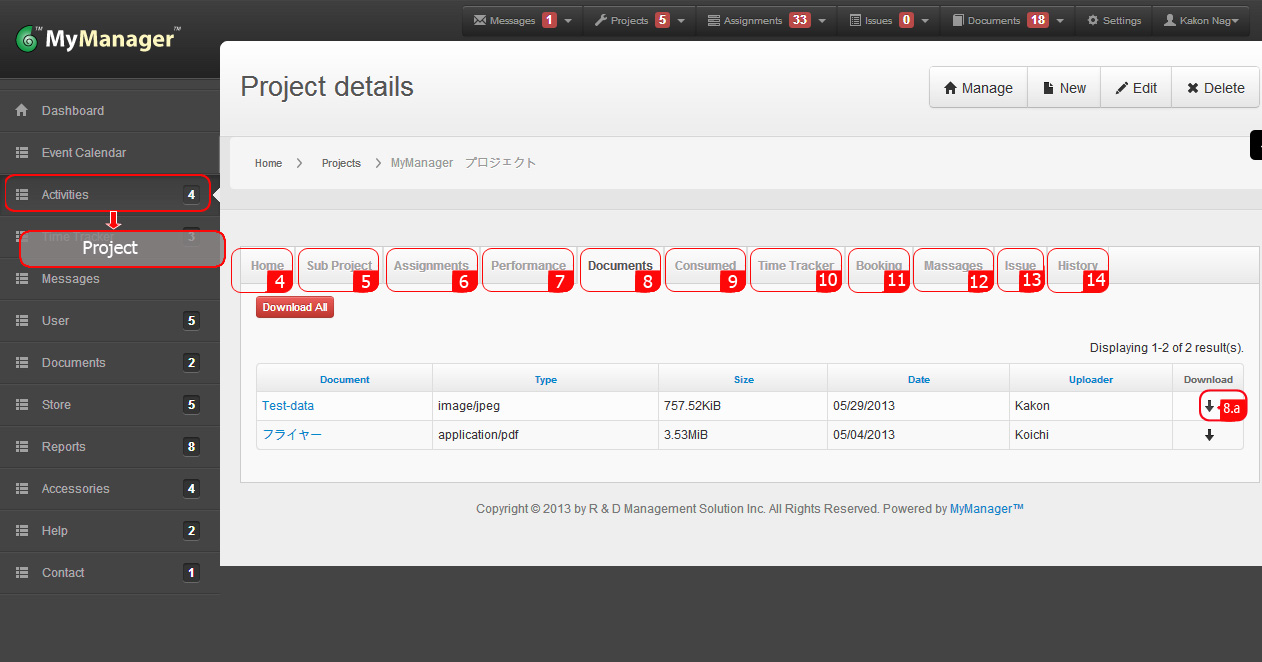
1. Rollover the cursor on Activities at left side menu bar and click.
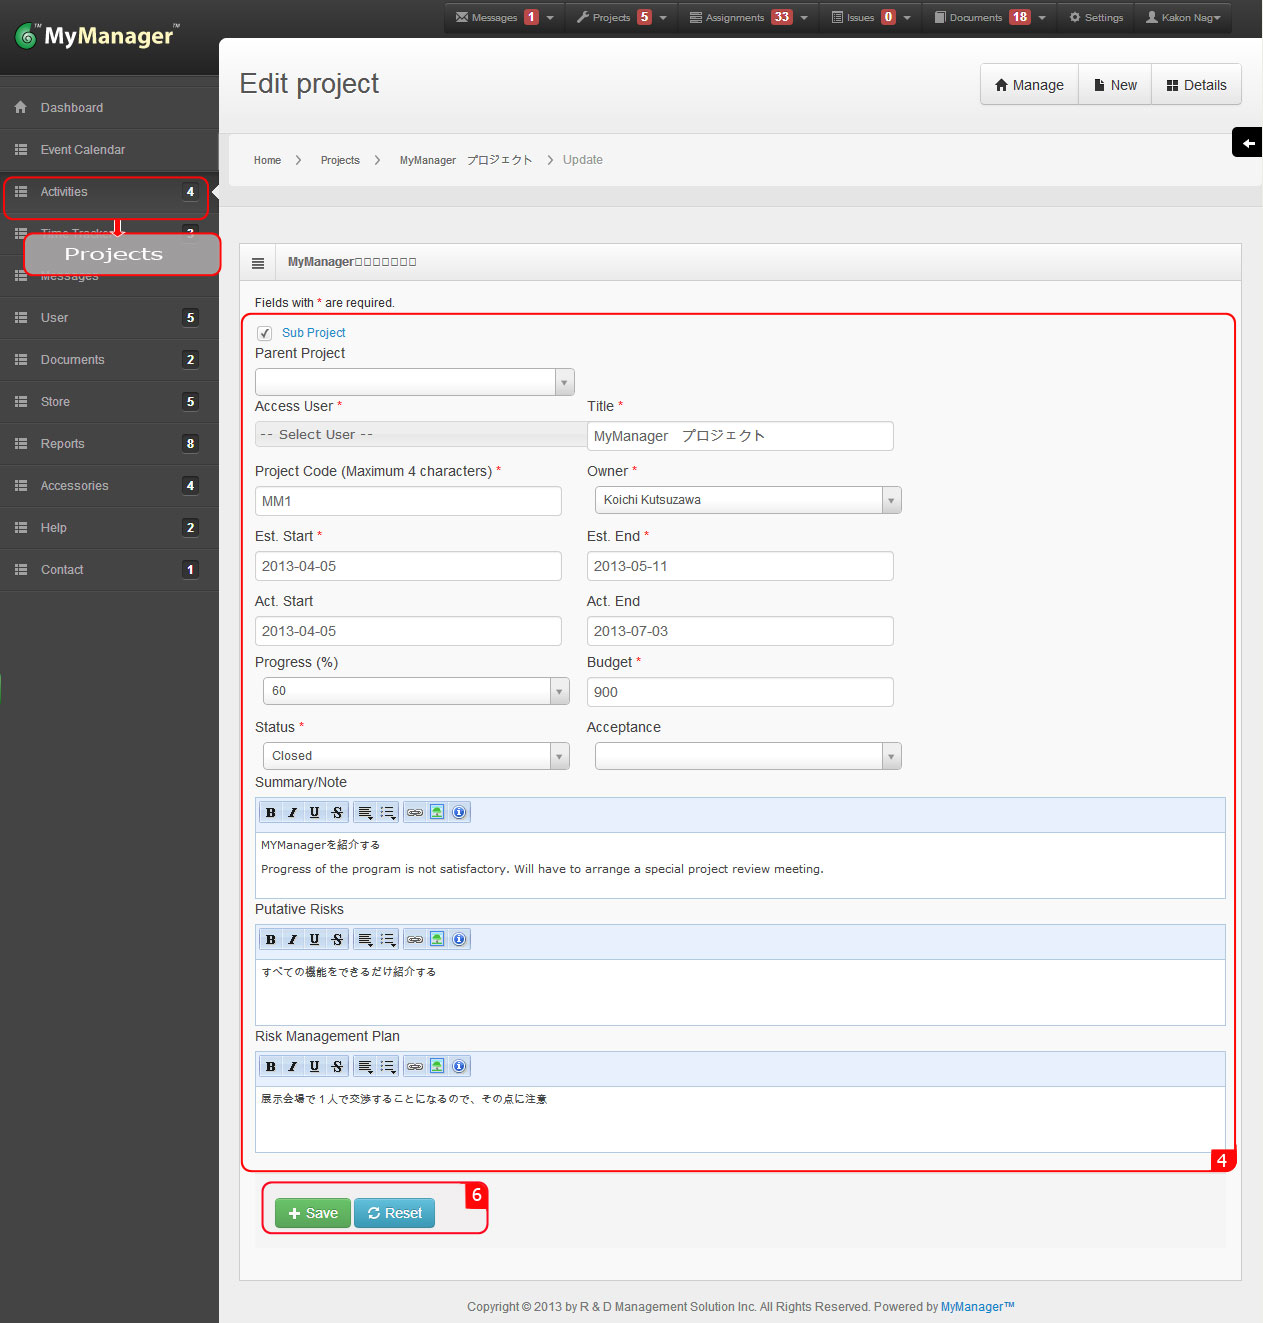
3. Click Pencil Icon under action header to update an project.
4. Reset necessary information.
6. Click Save.1. Rollover the cursor on Activities at left side menu bar and click.
2. Click project.
3. Click the Pencil Icon under action header to update an project.
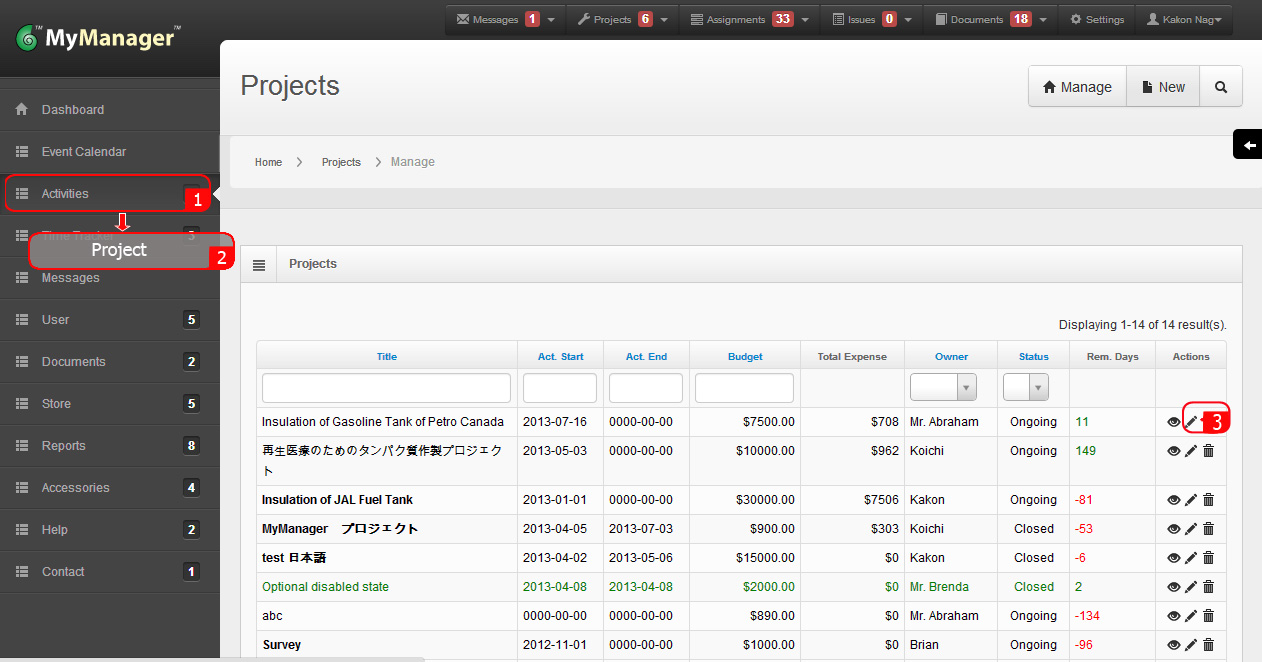
4. Reset necessary information.
5. During project closing, select either Yes or No from the drop down menu for Acceptance as justified. This will automatically change the project status to Closed, and actual end (Act. End) date will be auto filled to that day.
6. Click Save.
